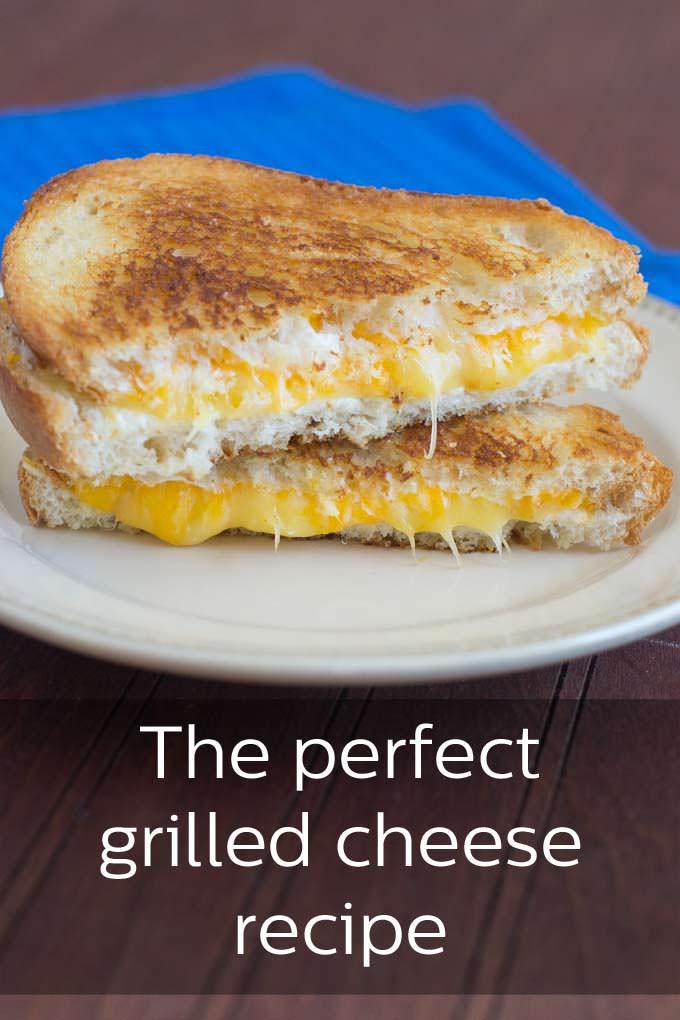
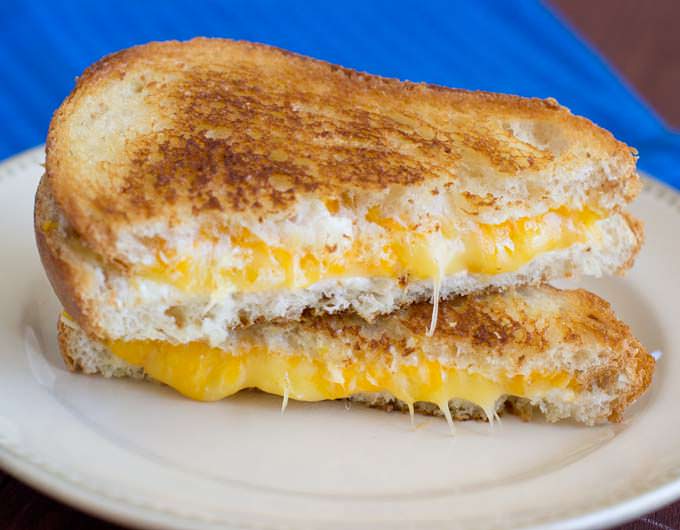
How do you make the ultimate grilled cheese sandwich? You need the right kind of bread, the right outer spread and, most importantly, the right combination of cheeses. We’ve got all the must-have info right here and man, are you ever in for a treat!
Typically when I make a grilled cheese sandwich I just use one kind of cheese. That’s out of convenience though, not because it’s the best way to do things. When I’m not in a hurry, and when I have an abundance of cheese in my fridge (like after we’ve had a party and there was a cheese tray on the loose), I go in with a combination of cheeses to create the ULTIMATE grilled cheese sandwich.
Scroll down to read more about how it all comes together or click here to jump straight down to the recipe.

Cheese Combinations For Grilled Cheese
Why use a combination of cheeses in a grilled cheese sandwich? Because different cheeses have different virtues. Getting a good blend of those virtues into one perfect sandwich is the goal. I like to use three kinds of cheese in my perfect sandwich. You don’t need very much of each one, just a bit. Together, you’ll have plenty of cheese and the blend of flavors and textures will be perfect.
So, we’re going in with three cheeses. Which three cheeses should it be?
#1: Something Creamy
You definitely want to include a rich creamy cheese in your sandwich. This cheese doesn’t have to get stringy as it melts. Its job is just to be buttery and rich.
You can use a bit of Brie cheese for this but the easiest thing is to spread the slices of bread with cream cheese (the inside parts of the bread, not the outsides that are going to hit the grill. See more on this below). If you’re into some processed cheese flavor in your grilled cheese, you can lay on a cheese spread like Cheez Whiz or use a processed cheese slice.
#2: Something Stringy
You really really need those wisps of stringy melted cheese to arch out of a good grilled cheese sandwich so make sure to include a cheese that melts in a stringy way.
Your processed cheese slice does this, as does mozzarella and provolone. Monterey Jack and Cheddar cheeses also get a bit of stringiness going on when melted.
#3: Something Flavorful
Now, depending on what you chose in the above two categories, you might not need much here. But a little bit of extra cheese flavor will take your sandwich to that ultimate level we’re aiming for. What should you look for here? A powerful cheese.
You can choose a cheese that has power all from itself, like a strong blue, if you’re into that, or a smoked Gouda. Or you can try a cheese that has flavor added to it, like a pepper jack or a Havarti with dill. Whatever you choose, don’t put too much! You don’t want to overpower the sandwich, just give it that tiny bit of extra oomph.
There you have it. The breakdown of the perfect cheese for grilled cheese sandwiches. I’ve used cream cheese, Monterey Jack, and smoked Gouda for the grilled cheese recipe below, but you can switch it up. Let me know your favorite combinations in the comments below.
What Kind Of Bread For Grilled Cheese?
What else do you need to know? What kind of bread to use on a grilled cheese sandwich, of course.
I know that a lot of people go with the Wonderbread style for classic comfort food grilled cheese, especially with those handy American cheese slices. But if you’re going with the three-cheese combo above, you’ve already strayed from that style of sandwich and you need to go with something a tiny bit better. Ideally, something with a bit of crunch to the crust and lots of air in the middle. The goal is a crunchy layer outside with a very soft pillow-y layer of bread between that crust and the cheese.
I like to get a loaf from the bakery section of the grocery store, a loaf that has been put into a perforated bag so that the crust hasn’t softened. An Italian bread or sourdough loaf work perfectly.
You’re going to hand-slice the bread so that it’s on the medium-to-thick side. Or ask the bakery if they have a thick-slice setting for slicing their bread. Some do.
Getting the Perfect Crust
As to that crust on the outside of your sandwich, how to attain that? We had heard that using mayonnaise instead of butter was the secret. We weren’t sure so we did a butter-versus-mayo taste test over here. The results were a bit mixed but clearly the better texture came from the mayonnaise. In your quest for the ultimate grilled cheese, you should try it at least once.
There you have it. The perfect grilled cheese. Enjoy!
More Cheesy Recipes
If you need to make a lot of grilled cheeses, you can try my Grilled Cheese for a Crowd method. But make sure to check out these other cheesy recipes too.
- Cheesy Taco Mac and Cheese
- Instant Pot Loaded Potato Casserole
- Creamiest Mac n Cheese
- Air Fryer Stuffed Chicken Breast
Podcast Episode About Making Grilled Cheese Sandwiches
Listen to me explain briefly about how to make this recipe, with some great tips along the way, by clicking the play button below:

The ULTIMATE Grilled Cheese Sandwich Recipe
How do you make the best grilled cheese sandwich? You need the right kind of bread, the right outer spread and, most importantly, the right combination of cheeses.
- Prep Time: 5 minutes
- Cook Time: 5 minutes
- Total Time: 10 minutes
- Yield: 1 serving 1x
- Category: Entrée
- Method: Stovetop
- Cuisine: American
Ingredients
- 1 Tbsp. mayonnaise (or use softened butter)
- 2 slices of white crusty bakery bread (hand-sliced medium-thick, sourdough, or Italian bread)
- 2 Tbsp. cream cheese
- 1/4 cup shredded Monterey Jack cheese
- 1 oz. smoked Gouda cheese, sliced
Instructions
- Spread mayonnaise on one side of each slice of bread. Flip them over. Spread both with cream cheese. Onto one slice, sprinkle the Monterey Jack. Top with slices of gouda and then invert the other bread onto it such that the cream cheese is against the gouda.
- Heat a skillet over medium-low heat. Put sandwich in skillet. Use a spatula to check underneath ever minute or so to make sure the toast isn’t browning too quickly. You need it to take a few minutes so that the cheese has time to melt. Cook until underside is toasted, 3-4 minutes. Flip sandwich over and cook until underside is toasted and cheese is very melted, 2-3 minutes.
- Transfer sandwich to cutting board and cut on the diagonal.
Love this recipe? I’d appreciate it if you could scroll down and add a *5 star rating* to help others know they’ll love it as well!
This post originally appeared in May 2016 and was revised and republished in November 2023.


The only thing I didn’t have on hand was the right bread. This was so good. Love the combination of cheeses.
Thanks, Michelle! I’m so glad you enjoyed.
Used cheddar instead of monetary but I’m never making it a different way again
Thank you for sharing, Riah. Glad you enjoyed so much!
Thanks Christine:
At 61, I’m getting to the point in life where I appreciate how easy it is to mess up basic comfort foods lots of us took for granted growing. Jiffy in the box is “idiot-proof.” But cast-iron skillet cornbread from scratch has yet to work out for me. Or seasoned-flour fried chicken.
That’s why I’ve never tried making a homemade grilled cheese with bacon. Yet. Got some smoked gouda; got some American cheese; got some “country white” bread. Gonna try the test kitchen thing with craft cream cheese spread, mayo and butter.
Some things take practice! Hope you’re able to perfect all your favorites, Kevin.
Haven’t made it but as a original grilled cheese sandwich advocate I appreciate a good cheese sandwich. I love smoke gouda & this sounds amazing! I look forward to incorporating more bread into my diet just to try this. Yay 4 cheese!
We’re big fans of all sorts of grilled cheeses around here!
Yum yum
Thanks, Teresa!
Wonder recipe, the image looks so tempting and cheese grilled sandwich is my all time favorite. I’ll definitely give it a try.
It’s a great comfort food, Amol! Enjoy!
Easier if you spread the cream cheese on the bread first and then the mayo on the other side..
Thanks for sharing your method, Susan!