Which Method is Best for Caramelizing Onions?
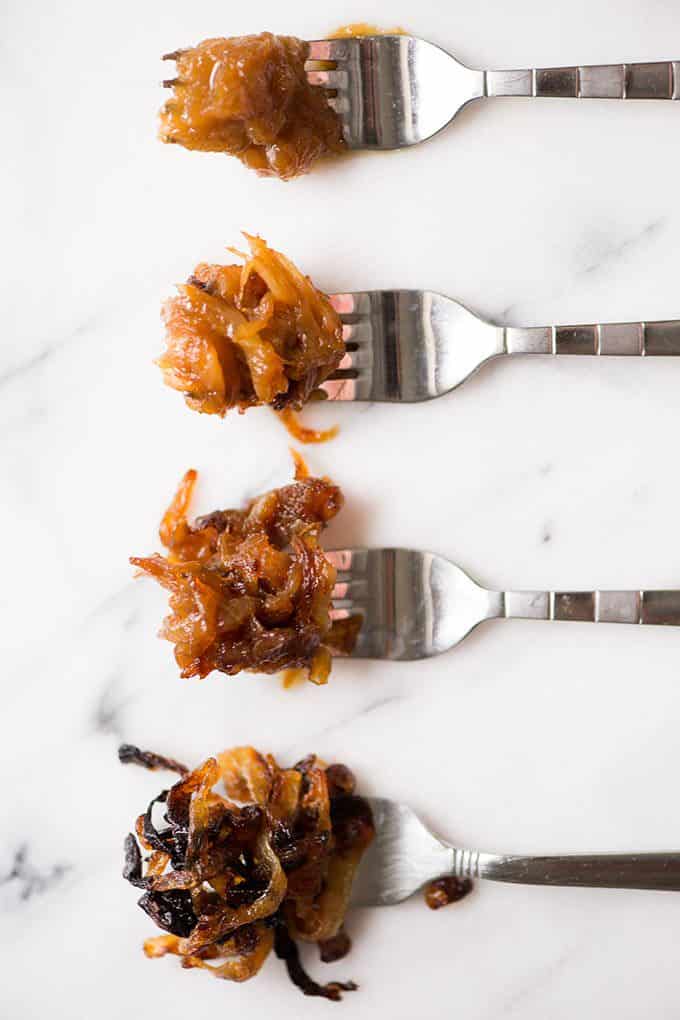
Love to caramelize Vidalia onions but don’t know which method is best? Have no fear, we tried out four different methods, from pressure cooking to the classic stovetop to help you decide which method is best!
We all know that caramelized onions make pretty much everything better, from burgers to pizza to quesadillas. But is it really necessary to hover around the stove for an hour to get perfectly soft, deep brown, sweet and savory onions? We put four methods to the test to see how you can get the best caramelized onions, hopefully without the need to play onion guardian.
Method 1: Classic Stovetop Caramelized Onions
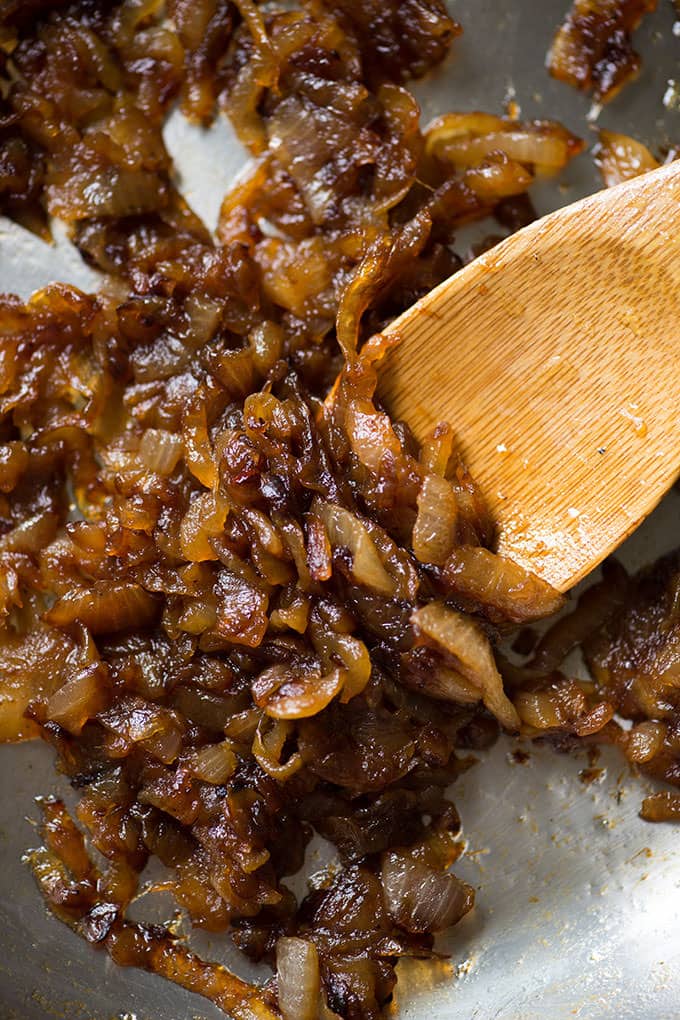
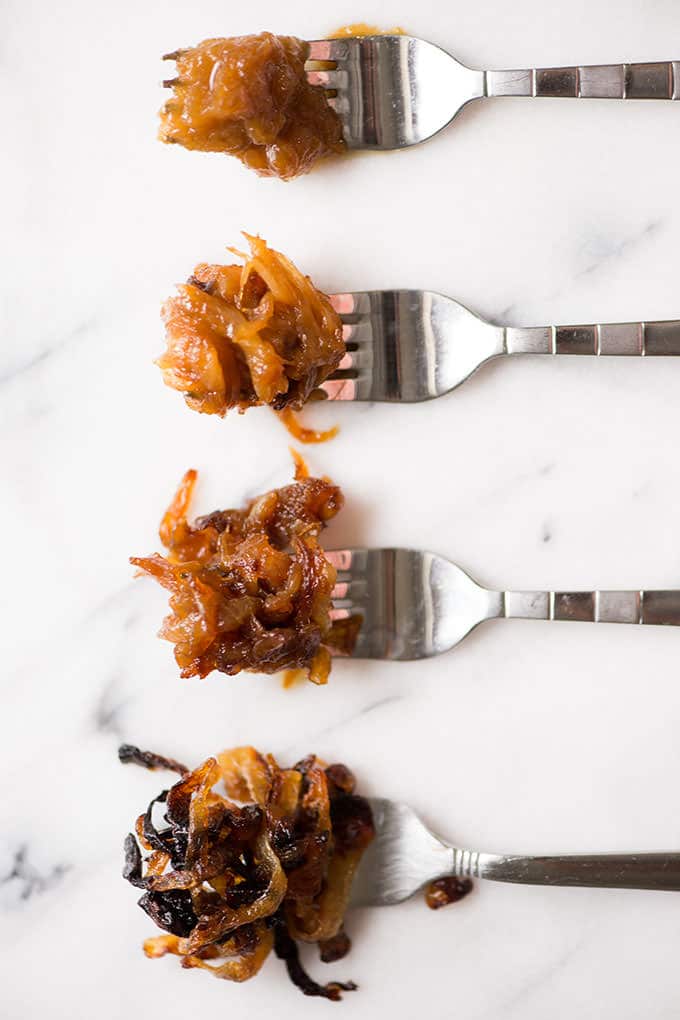
This tried and true method will yield you perfect caramelized onions. It gives you a lot of control, since you can stop when the onions are light blonde or keep on cooking for a deeper color and flavor. The downside is it takes a lot of time (45-75 minutes) of hovering over a stove with a watchful eye.
Ingredients:
- 2 tablespoons of olive oil
- 2-3 sweet Vidalia onions cut in half lengthwise, then sliced ⅛- to ¼-inch thick
- ¼ cup red or white wine, beer, broth, balsamic vinegar, or water for deglazing
- Salt and pepper, to taste
Directions:
- In a large stainless or cast iron skillet, heat the oil over medium heat until shimmering. Add the onions and stir to coat them with oil. Stir the onions every 10 minutes for the first 30-40 minutes.
- Once the onions start to deepen in color, stir them more frequently to ensure no onions burn at the bottom. Somewhere between the 40 and 75 minute marks, your onions will achieve a deep brown color and will be fully caramelized.
- Once they are browned and have achieved a flavor you like (yes, taste testing is recommended!), add your deglazing liquid and quickly scrape up the fond from the bottom of the pan. Add salt and pepper.
Method 2: Pressure Cooker Caramelized Onions
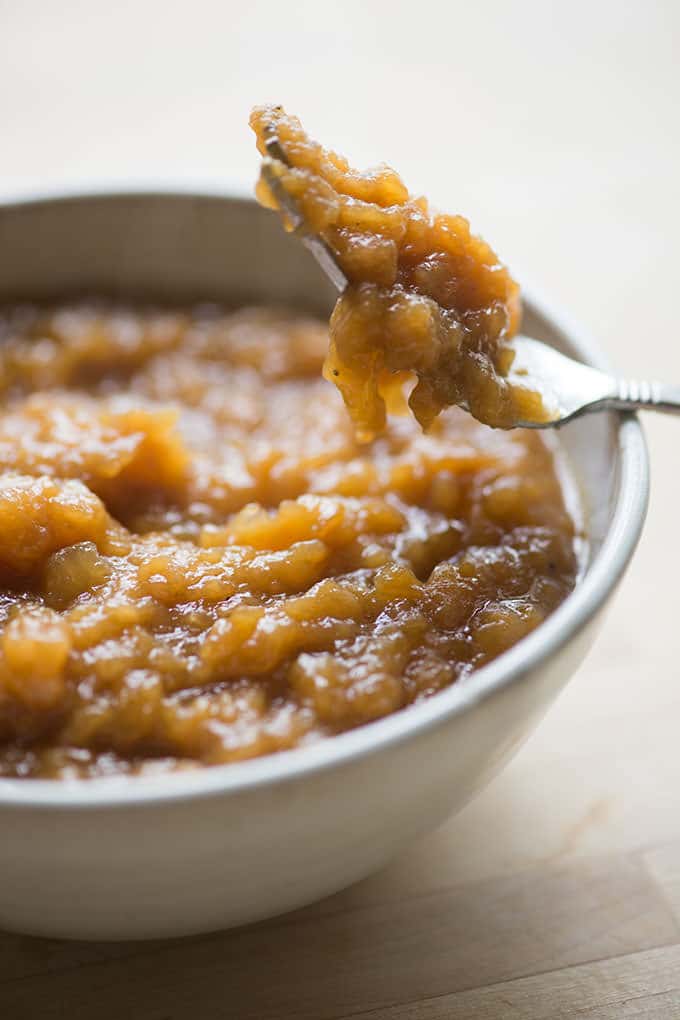
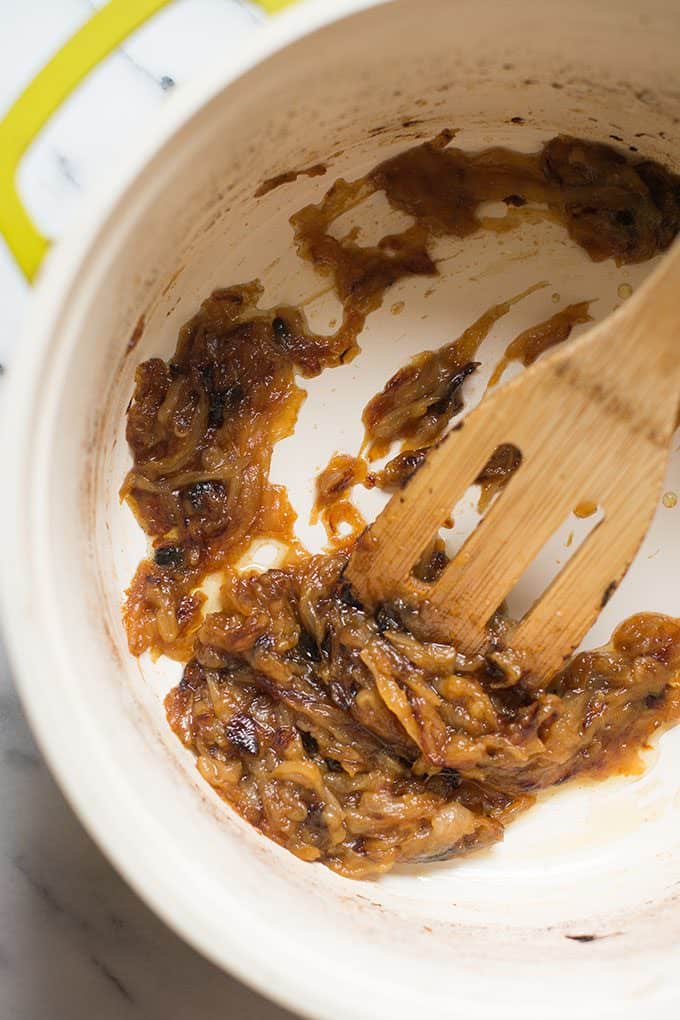
Developed by Kenji at Serious Eats, this pressure cooker method has an advantage because it cuts the cook time in half. However, the resulting onions have a less complex flavor than true caramelized onions and are more jam-like in consistency.
Ingredients:
- 2 tablespoons of olive oil
- 2-3 sweet Vidalia onions, cut in half lengthwise, then sliced ⅛- to ¼-inch thick
- ¼ teaspoon baking soda (optional, for extra browning)
- Salt and pepper, to taste
Directions:
- Add oil, onions, and baking soda (if using) to an electric or stovetop pressure cooker and stir to combine. Cook the onions for 3-5 minutes, until they soften slightly. (You can do this on the stove over high heat, or use the sauté/browning feature of your electric pressure cooker.)
- Seal your pressure cooker and cook on high pressure for 20 minutes. Vent the pressure cooker to release the pressure, then remove the lid. The onions will have released quite a bit of liquid, so return the pressure cooker to high heat on the stove or use the sauté function to cook off the excess liquid, another 5-10 minutes, stirring frequently. Season with salt and pepper.
Method 3: Baking Sheet Caramelized Onions
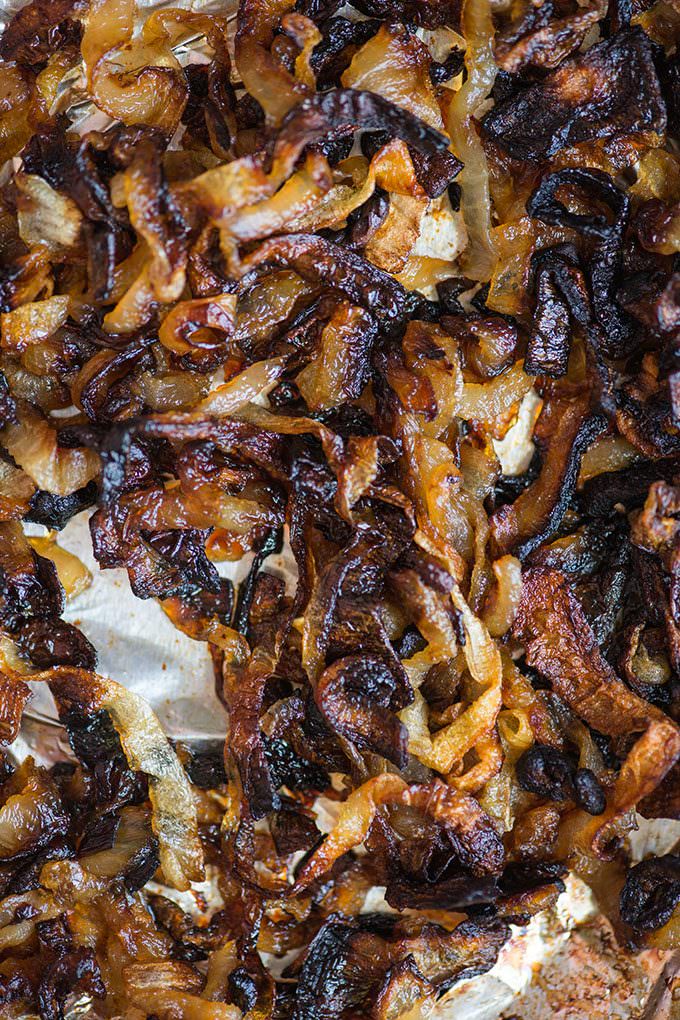
While this technique is commonly seen on the internet as an “easy” way to caramelize onions, the results are pretty disappointing. The onions require frequent stirring and still take 45 minutes to obtain a good color. The onions dry out very quickly and have a tendency to burn at the edges. The onions range from tasting burnt to bland, and don’t have the sweetness of caramelized onions.
Ingredients:
- 2-3 Vidalia onions cut in half lengthwise, then sliced ⅛- to ¼-inch thick
- 2 tablespoons of olive oil
- Salt and pepper, to taste
Directions:
- Preheat your oven to 400°F. Line a baking sheet with foil and spread the sliced onions evenly onto the baking sheet. Drizzle with oil and season with salt and pepper, then toss the onions to coat.
- Spread the onions back out and place the baking sheet into the oven. Cook the onions for 30-45 minutes, stirring every 5 minutes. Remove the onions once they are translucent and golden brown. A longer baking will result in more deeply flavored onions, but the edges will become charred.
- Remove from the oven, and fold the foil inward to create a sealed packet. Rest for 5-10 minutes to steam the onions before serving.
Method 4: Dutch Oven Caramelized Onions
These onions were nearly indistinguishable from the stovetop onions in both appearance and flavor, and also required less babysitting. They still take about 45 minutes to cook, but they only need stirred every 15 minutes. This is our winner for alternative methods!
Because it’s the best method, here’s a printable of the instructions for you.
Print
Caramelizing Onions in your Dutch Oven Recipe
- Prep Time: 5 minutes
- Cook Time: 45 minutes
- Total Time: 50 minutes
- Yield: 2 cups 1x
- Category: Side Dish
- Method: Baked
- Cuisine: American
DESCRIPTION
Caramelizing onions couldn’t be any easier or taste any better than making them in your Dutch oven.
Ingredients
- 2 Tbsp. of olive oil
- 2–3 sweet onions, such as Vidalias, cut in half lengthwise, then sliced 1/8- to 1/4-inch thick
- 1/4 cup red or white wine, beer, broth, balsamic vinegar, or water for deglazing
- 1 tsp. salt
- 1/4 tsp. pepper (or to taste)
Instructions
- Preheat your oven to 400°F. Combine the oil and onions in a nonstick Dutch oven. Cover the Dutch oven with a lid.
- Bake for 40-45 minutes, stirring every 15 minutes, until the onions are deep brown in color.
- Remove the pan from the oven, add the deglazing liquid and quickly scrape up the onion from the bottom and sides of the pan. Season with salt and pepper.
Love this recipe? I’d appreciate it if you could scroll down and add a *5 star rating* to help others know they’ll love it as well!
Disclosure: This post is sponsored by the Vidalia Onion Committee. All opinions are ours and honest.
This post originally appeared in August 2016 and was revised and republished in June 2023.


How about in a slow cooker, ie crock pot?
We didn’t test the slow cooker for this, Connie. I’ve seen recipes that call for 8-12 hours in the crock pot with occasional checking in and stirring, but there seem to be mixed results. If you give it a try, let me know how it works out for you!
Made these caramelized onions last night. I had 4 onions because I was making French onion soup. I used my Dutch oven, cranked my oven up to 400 degrees F, and followed the recipe, and stirred every 15 minutes.
At 45 minutes, the onions were still firm. At 1.5 hours, they were soft and smelled great, but still white/translucent, so I cranked it up to 415 degrees and sprinkled in a bit of sugar. It wasn’t until 2 full hours that they started to get brown. In my oven, in a Dutch oven, I got wonderful caramelized onions at about 2 hours at 15 minutes – unfortunately after my kids were in bed so I have to save them and make soup another day.
I will follow this method in the future, but will probably stir about every half an hour, and plan for at least 2 hours.
Thank you for sharing your experience with us.
Hi. I normally cook 5 kg onions in 3 trays in oven, without dutch oven. I let them like 3 hours at 120 and then 3 hours at 100 degrees C. I turn them around 2 times during the 6 hours. They are simply great, not burnt.
Thanks for sharing, Diego!
I took the lid off for the last fifteen minutes and got perfect yummy caramelized onions. I didn’t add any liquid..
Thank you for letting us know, Judith!
I tried the oven method with 3 large sweet onions in my cast iron/enamel Dutch Oven. After 90 minutes I had very soft onions poached in their own liquid.
Before they became entirely soup I pulled them out, strained them well and finished them by stirring for another 30 minutes in a cast iron frying pan with butter. Which eventually evaporated the residual liquid and left me with a brown sort of cross between caramelized onions and relish. The liquid drained from the Dutch oven worked well to deglaze the frying pan.
It worked fine for burger topping and did save some stirring time. It also avoided the problem I sometimes have which is the onions get brown before I have the texture I want. I think I will continue to start them in the oven but finish in the frying pan.
Thank you for sharing your detailed process with us, Maria!
I used 3 large yellow onions. I found that keeping the cover oven for 45 minutes creates the desired texture ive never been able to get on the stove top. However, they do npt brown and create a ton of steam, obviously. Im having to cook them for further 45 minutes cover off. They are barely browning but thet are getting stickier which is good. I think next time (i got a big bag of onions to play with 🙂 )ill leave the cover off at the start but ill also heat up the oven with the pot instead of putting in the pot after oven heats up. Theres a ton of water in onions so im not too worried cover off will be detrimental.
Thanks for sharing your results with us, Luke!
The oven works great, especially for large amounts. I usually do 5 pounds or more at a time, and do get a bit of liquid. I lower the temp to 375, remove the lid and stir every 15 minutes or so until the liquid is gone. More onions means more time, but less frequent attention in the beginning. I never do stove top and I deglaze with vegetable broth. I freeze them and break off pieces as I need the onions.
Thanks for your input, Sally!
I get also my onion with a lot of liquid. I found one solution for this problem: use a sieve to separate the liquid and the onion (be extremely careful, because the Dutch oven is extremely hot). I save the liquid and called it onion broth. It can even be used to deglaze the onions later or be frozen and used it later on any recipe that requires broth, or water. It gives a extra umami on cooking rice, for example.
What a great solution, Francisco! That sounds like some good rice.
Hej
I tried the dutch oven method.
But the liquid from the onions prevent them to brown so i emptied the dutch oven over and over again and took a very long time too finish. I think the lid prevents the liquid from escaping.
What did you do in this situation ?
Brian, I didn’t get a liquid build up when I did this. I wonder if my onions were a lot smaller than yours. If there’s a lot of onion in the pot, they would steam and get liquidy for sure. You could try doing it with the lid off, but then you might want to check on them more often.
I tried the dutch oven in the oven method–turned out great! Used just under a 1/4 cup mix of balsamic and water mixed. Thanks!
You’re welcome, Greta. And thanks for the tip!
I’m going to try making these in the oven tomorrow. Planned to try making them in the slow cooker but read reviews and saw pictures of them; they didn’t look very appetizing and many people said they didn’t have the complex taste of stovetop caramelized onions. Reviewers had the same reaction about those made in a pressure cooker, too. At least these looked like the ones I’ve made on the stovetop and I’ll take your word about the taste and will give them a try. Thanks testing these three methods of making them versus the good old stovetop ones.
You’re welcome, Michelle. I hope you liked them!
Are you adding the liquid every 15 minutes?
Christine, I’m not sure what you’re referring to. There is no instruction about adding liquid regularly.