Homemade Kielbasa
Homemade kielbasa is surprisingly easy to make at home, even without any special sausage-making equipment. It tastes so good, you’re going to love being able to make this yourself!
I used to have a big smokehouse in my backyard. In fact, I used to have a business selling smoked meats. Before that, I began my career as a meat inspector for the Canadian federal government. I therefore have made and smoked a lot of sausages in my life.
This year, we found ourselves at home in our small condo wondering if we could make sausages as good as we used to when we had all the equipment and tools that we used to have. We experimented with various things and have developed this wonderful technique for making sausages at home without special equipment.

Today, we’re applying that technique to kielbasa. In our home, we sometimes call this kind of sausage Garlic Sausage. What it is, essentially, is a (mostly) pork sausage with a mild garlic flavor.
This kind of sausage is traditionally smoked. That results in the casing having a smoky flavor. We’re not smoking this sausage though. Instead, we’re baking it in the oven. If you’d like, you can add a drop of liquid smoke to the meat mixture. It is a very potent ingredient though so be careful. Also, be sure to do as instructed in the recipe and add the liquid smoke to the other liquids and stir it up so that it disperses well into the meat and doesn’t end up too concentrated in one spot.
For your info, I actually don’t put the liquid smoke in this kielbasa when I make it. I find it too overpowering, and I don’t like it flavoring all the meat like that.
The Meats To Use For Kielbasa
You’ll see that we call for three types of meat in this recipe. There’s good reason for that.
The ground pork gives lots of juiciness and also the smooth texture to the sausage. The ground beef is a bit leaner. It also has that smooth texture though, and it adds an extra element of meaty flavor.
Finally, and importantly, you’ll see that there’s cubed pork in there. You can go lean with that and use tenderloin, or you can use something with more marbling like pork butt. Either one will work. The important thing is that you cut it into the ½” cubes before adding it in. It is those cubes that give kielbasa the chunks that you see when you cut into it.
So the idea is that the ground meat mixture is suspending, or holding in place, the nice chunks of meat.
What Do You Add To The Meat For Kielbasa
To the mixture of three meats, you’re adding another mixture. This is garlic that has been pureed with water. Pureeing it with water just allows the blender to chop it up more easily. And, since we need water in our meat mixture anyhow, you then use that water also.
To that garlic and water mixture, you add salt and meat-cure-powder that has been dissolved in water. You also add black pepper to that, and the liquid smoke if you’re using it. You therefore have a mixture of water, garlic, salt, cure, pepper, and optional liquid smoke. Stir that up really well and then add it to the meat.
The idea here is that all the flavors are being combined with water, which helps it to be more easily dispersed evenly throughout the meat.
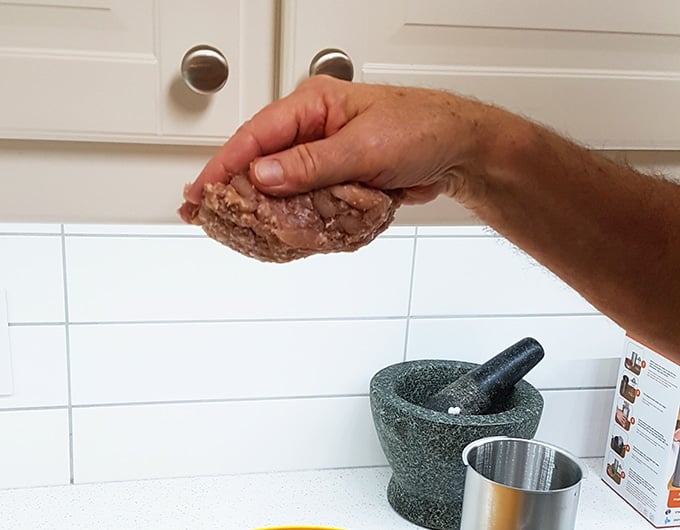
After that garlic mixture is mixed in, you then add more water, 1 teaspoon at a time. Keep mixing and adding water until it is really sticky. Really sticky. If you take a handful of the meat mixture and squeeze it in your hand, then invert your hand, the meat should be sticky enough that it doesn’t fall off.
How To Shape/Stuff Kielbasa
We’re giving you instructions for two ways to make the kielbasa. One option involves no special equipment at all. The other involves the use of a sausage stuffer.
How To Make Kielbasa Without A Sausage Stuffer
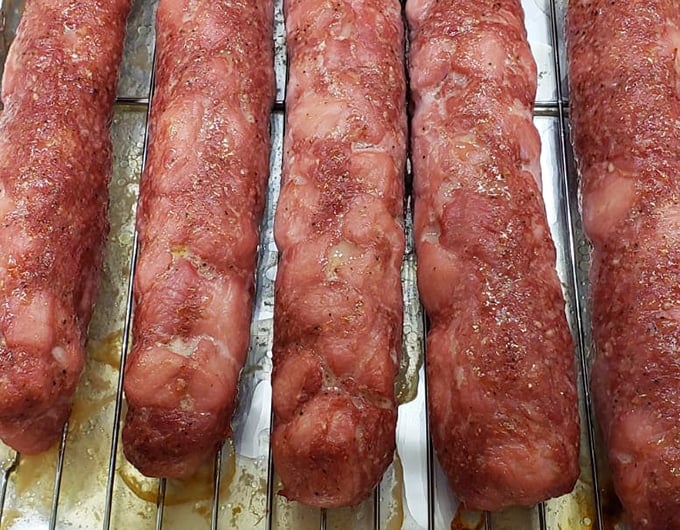
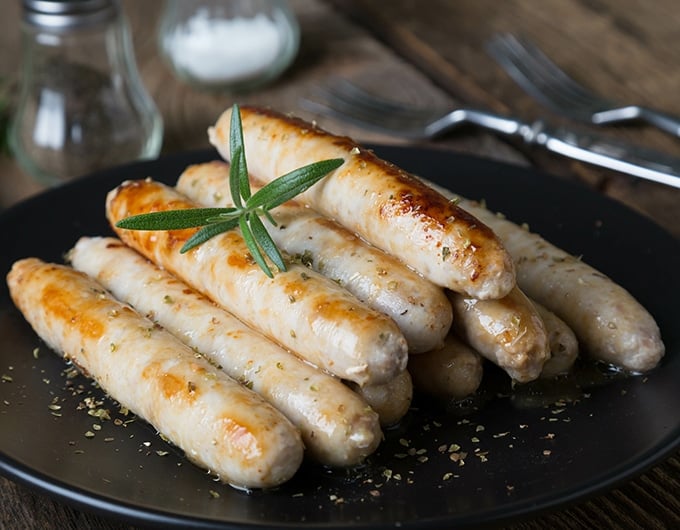
I’ll admit that this close-up picture of kielbasa without casings looks a bit odd, but truly, even without casings or a sausage-stufffer, these do look like kielbasa sausage, and, more importantly, they taste amazing!
To make kielbasa without a sausage stuffer, you’re going to follow the detailed instructions over here. To give you the idea though, what you’ll be doing is taking two pieces of plastic wrap and overlapping them. Then you scoop a handful of the meat mixture onto the plastic wrap. Shape the meat into a cylinder that is the length and diameter that you’d like your sausage to be. We typically do a 1 and ½ inch diameter and 12 inches long.
Then wrap the meat in the plastic wrap, burrito style. Wrap it nice and tight.
Then, wrap that in aluminum foil. Repeat the plastic wrap and foil with all of your meat.
Put your wrapped meat into a single non-overlapping layer on a tray in the fridge. Let them sit there for 24 hours. The tight wrap and the cold will form your kielbasa in a way that keeps its shape. That stickiness that we talked about above is also helpful for this.
When you’re ready to cook your kielbasa, unwrap them from the foil and from the plastic. You’ll have nice sausage-shaped cylinders of meat that you can then cook following the instructions below.
How To Make Kielbasa With A Sausage Stuffer
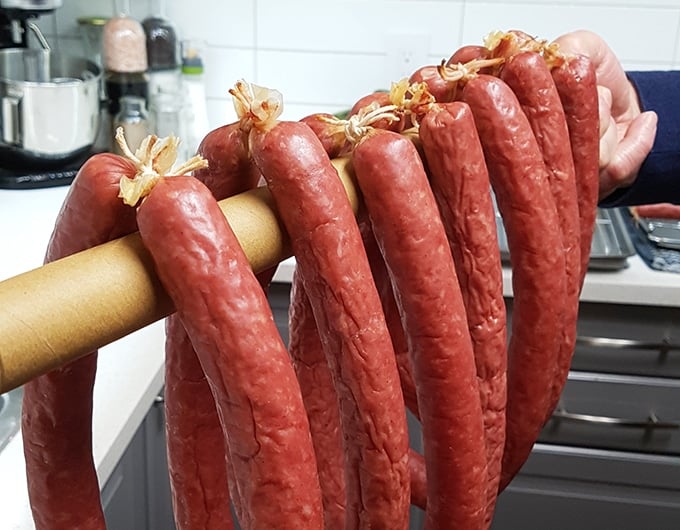
Whether you have a Hand Crank Sausage Stuffer, or a KitchenAid Attachment, you should read the instructions that came with your equipment, and buy the casings that they recommend in terms of size and material. We use collagen casings, like these.
It’s a good idea to read the instructions on the casings that you get as well. If they don’t have instructions, read the reviews on Amazon. You’ll find out if you need to wet the casings first, and also good info about how to cook the sausages so that they don’t split.
As mentioned, you should read the instructions on your sausage-stuffing machine. But basically, you’ll be putting your meat mixture into the sausage stuffer meat compartment. Then you’ll put the casing on the tube that the meat comes out of. Finally, you’ll control the meat coming out using the hand crank or it will be done by the machine.
Your task is to control how much casing you’re feeding at a time to get an even thickness of sausage into the stuffing. Do not overstuff the sausages. This can lead to the casings splitting while you’re stuffing them, or even later when you try cooking them.
Be aware that feeding the meat into the casing takes some practice. You need to get a feel for how much meat passes through, and then you need to twist the casing (squeeze the meat through the casing to make a good indent, then twist the casing) so that you have individual sausages and not one long continuous sausage.
You will get the hang of it though. It just takes a little bit of practice. Be sure to take pictures of your first kielbasas coming out of the stuffer though. It’s an achievement, and you’ll be amazed at how much better you get at it.
After you’ve stuffed the kielbasa, arrange it in the refrigerator for 24 hours in a single layer. If you pile it, the top ones will squish the bottom ones. It is important that the kielbasa goes in the fridge for 24 hours because that allows the cure to really penetrate and gives it a more even distribution. If you don’t let it sit in the fridge, you might end up with parts of your sausage that aren’t pink/red because the cure didn’t get to that part as well.
How To Cook The Kielbasa
Whether you have sausage-shaped cylinders without casings (following from the “Without A Sausage Stuffer” section) or sausage in casings, you’re going to proceed in the same way.
Heat the oven to 325F. Arrange your sausages or meat cylinders in a single non-overlapping layer on an oven-safe rack set over a sheet pan. You keep the meat on the rack so that fat and liquid can drip down off the sausages and onto the pan. In that way, the sausages aren’t sitting in the liquid. Also, this allows for the air to circulate all around the sausages, which leads to more even cooking.
Bake the kielbasa until an instant-read thermometer reads that the middle of the kielbasa has reached 160F. This will take 45-60 minutes.
Then you simply take it out of the oven, let it cool, and dig in!
Enjoy! – Barry 🙂
Podcast Episode About Making Homemade Kielbasa
Listen to our editor, Christine Pittman, explain briefly about how to make this recipe, with some great tips along the way, by clicking the play button below:
Listen to more Recipe of the Day episodes here.
Print
Homemade Kielbasa
- Prep Time: 15 minutes
- Cook Time: 45 minutes
- Total Time: 1 hour
- Yield: 40 servings 1x
- Category: Entree
- Method: Stir
- Cuisine: American
DESCRIPTION
Homemade kielbasa is surprisingly easy to make at home, even without any special sausage-making equipment. It tastes so good, you’re going to love being able to make this yourself! Note: It’s traditional to use weighted measures in sausage-making. If you don’t have a kitchen scale, use the volume measures in the NOTE below.
Ingredients
- 0.2 oz. garlic
- 1.25 oz.* salt
- 0.25 oz. Morton’s Tender Quick Meat Cure (buy here)
- 0.15 oz. pepper
- 1 drop liquid smoke (optional)
- 2 lbs. cubed pork, 1/2″ cubes
- 1.5 lbs. ground pork
- 1.5 lbs. ground beef
- Water
Instructions
- Use a blender to puree the garlic with 2 tablespoons of water. Set aside for a moment.
- In a small bowl, measure 2 tablespoons of water. Dissolve the salt and the Morton’s meat cure in this water.
- Add the salt and cure mixture to the garlic and water mixture. Then add the pepper, and the liquid smoke (if using), to this mixture as well.
- Combine all the meat in a large mixing bowl.
- Add the garlic-pepper-salt-cure-water mixture to the meat and mix with your hands.
- Continuing to combine the meat with your hands, adding water, 1 teaspoon at a time, until you have a sticky mixture that really sticks to your hands. If you squeeze a handful of meat in your hand, open your hand, and then invert it, the meat should not fall off but should be stuck to your hand.
- Place the mixture into a sausage stuffer (like this one or this one) and stuff into casings following the sausage stuffer’s instructions. Or, follow the instructions above or here for making sausage without special equipment. You’ll want to make your cylindrical meat shapes about 1 and ½ inch in diameter and about 12 inches long.
- Refrigerate the sausages (whether in casings or in plastic wrap+foil) in a single layer for 24 hours to allow the cure to properly penetrate and for the shape of the sausage to set.
- Preheat oven to 325°F.
- Carefully remove foil and plastic wrap from tubes of meat if you used them instead of casings. Carefully lay the cylinders of meat, or your casings stuffed with meat, on an oven-safe rack placed over a baking sheet.
- Put into the oven and bake until meat reached an internal temperature of 160°F on an instant read thermometer (like this), 45-60 minutes.
- Take out of oven and let cool.
- Slice and enjoy.
Notes
*Here are the approximate volume measurement equivalent for the seasonings in the recipe:
- 2-3 cloves garlic
- 6 tsp. salt
- 1 and ½ tsp. Morton’s cure
- 2 tsp. black pepper



can’t wait to try recipe. we want to use our smoker How can we do that.
I have not done that before, Anne, but would love to hear how it goes if you try it!
How would I do this on a smoker ? Not an oven … any idea?
I cannot have any pork, do you think I could substitute chicken thighs for the pork?
Lisa, I think it will work to substitute the chicken thighs for the cubed pork. As to the ground pork, I’d probably use ground beef but with a higher fat content (not lean).
Voy a intentar con el Kielbasa.Gracias
Enjoy, Carlos!
What kind of cubes pork do you use? I’m also thinking of doing an uncured version, so a fresh kielbasa.
You can use pork tenderloin for the cubes if you’d like something leaner, or go with something like pork butt. Enjoy, Beth!
I am going to try this
Enjoy, Cynthia!
Hi,
I was just starting to look not this and picked your link first.
We love this kind of sausage, but don’t want the preservatives and goodness knows what else that we see on the packages, so we stopped buying it. We miss it!
Love the straightforward approach you describe here and we’re going to try it.
I would like to substitute ground Turkey for the ground beef. Any thoughts about that?
Many thanks,
Nancy
Lynn, I would normally worry a bit about substituting turkey in for beef because it could be drier. I think in this case though, since there’s ground pork still in the mix, and the pork cubes, and if you use ground turkey and not ground turkey breast, it should work out just fine. If you try it, come back and let us know what you think!
I too dislike liquid smoke. However I work around the smoke problem and while not as good as done in a smoker, I add powdered smoke to my mix. It’s MUCH easier to properly distribute the powder.
I don’t use casings at all. I extrude the meat cutting to the lengths most suitable for my personal use, and transfer them to an oiled parchment paper on my dehydrator trays. (Lem dehydrator, 5 trays 15″ square) and treat them at 155°F until the exterior has a good firm coat to it.
I finish them off with a water bath at 165°F until inside is at 155°F.
I extrude 2″ diameter chubs and 1 1/4 “fingers” as I like the chubs for slicing on cheese and crackers.
I don’t use heat above 170°F max as I found a few years ago it would melt the fats inside the sausages with some leaking out and leaving holes inside the sausages.
Thank you for sharing with us, Ray Jay!