
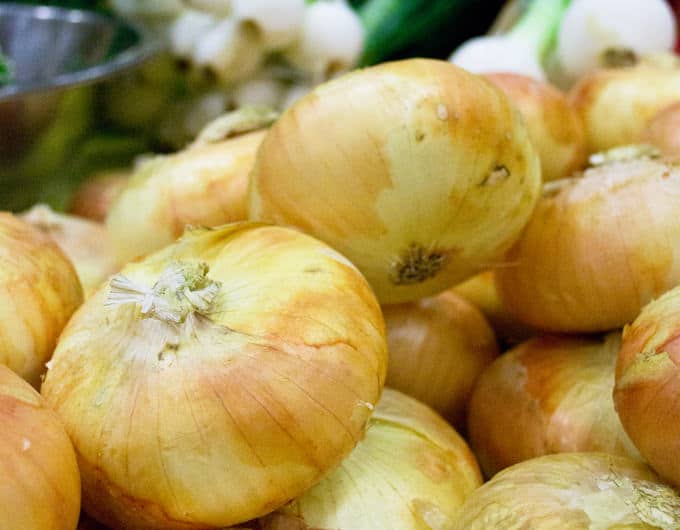
How to Bake Vidalia Onions

If you got it, flaunt it. Show off your Vidalia onions as the star of the show by baking them whole and serving as a gourmet side dish. This series is sponsored by the Vidalia Onion Committee.
Baked whole Vidalia onions are a super simple side dish with a flavor reminiscent of French onion soup. And the gourmet presentation can’t be beat! Our instructions are for one onion, but you can easily bake up to six onions on the same baking sheet for an impressive dinner party spread.
Scroll down to read more about how it all comes together or click here to jump straight down to the recipe.

Video: How To Bake Vidalia Onions
Step By Step Instructions
Step #1
First, preheat your oven to 350°F. Peel your onion, leaving the root intact. If your onion sits level, you can leave it alone. If not, cut a thin slice off the root to create a flat bottom.

Step #2
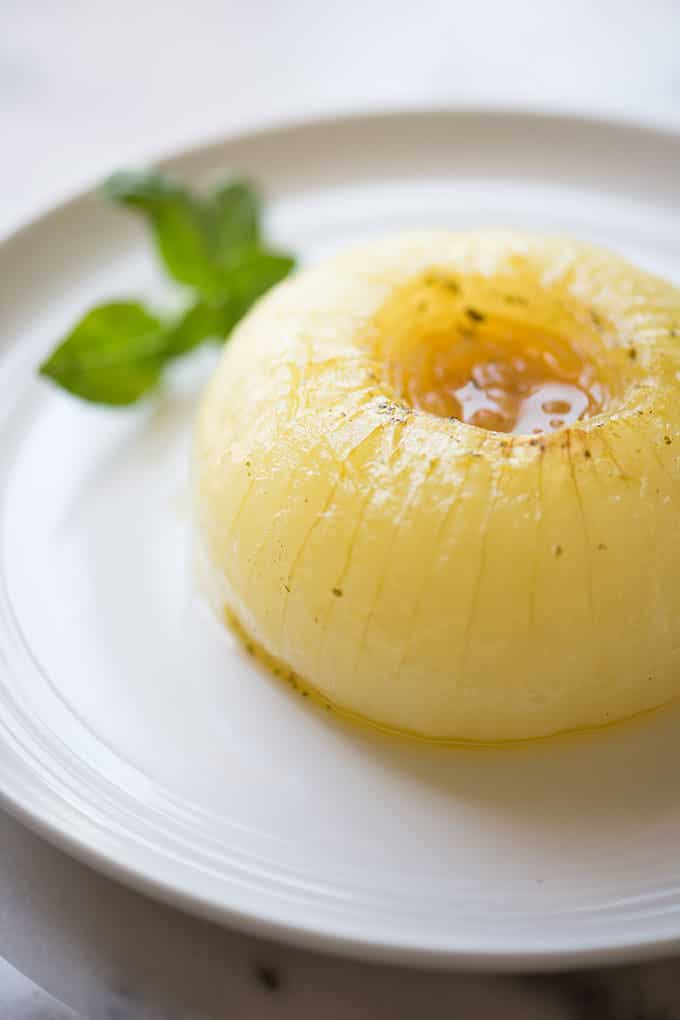
Use a paring knife to cut a 1-inch deep cone into the top of the onion.

Step #3
Insert a vegetable, chicken, or beef bouillon cube into the hole. We’re using a standard-sized 4 gram bouillon cube here, not extra-large ones. You can cut large ones smaller as needed. If you’re using granulated bouillon, use 1 tablespoon. Alternatively, you can use 1 teaspoon of your favorite seasoning blend. I really like to use Italian Sausage Seasoning or Montreal Chicken Seasoning with these onions. Note that if the blend doesn’t contain salt, add 1/4 teaspoon of salt.

Step #4
Fill the rest of the hole with butter, about 1-2 tablespoons. Season with salt and pepper.

Step #5
Place the filled onion on a sheet of foil large enough to encase it. Wrap the onion in foil, bringing the edges up in the center.

Step #6
Twist the foil together to seal the onion in. Place the foil-wrapped onion on a baking sheet.

Step #7
Bake for 45-60 minutes, until the onion is tender. Serve warm.

More Easy Vegetable Side Dishes
Love this simple recipe? Try one of our other easy veggie recipes.
And make sure the bags of onions you buy stay fresh with our tips on how to store onions.
Podcast Episode On Baking Vidalia Onions
Listen to our editor, Christine Pittman, explain briefly about how to make this side dish, with some great tips along the way, by clicking the play button below:
Listen to more Recipe of the Day episodes here.
Print
Classic Baked Vidalia Onions Recipe
- Prep Time: 5 minutes
- Cook Time: 45 minutes
- Total Time: 50 minutes
- Yield: 1 serving 1x
- Category: Side Dish
- Method: Baked
- Cuisine: American
DESCRIPTION
If you got it, flaunt it. Show off your Vidalia onions as the star of the show by baking them and serving as a gourmet side dish.
Ingredients
- 1 Vidalia onion
- 1 (4 gram) vegetable, chicken, or beef bouillon cube*
- 1–2 Tbsp. butter
Instructions
- Preheat your oven to 350°F. Peel your onion, leaving the root intact. If your onion sits level, you can leave it alone. If not, cut a thin slice off the root to create a flat bottom.
- Use a paring knife to cut a 1 inch deep cone into the top of the onion.
- Insert a vegetable, chicken or beef bouillon cube into the hole.
- Fill the rest of the hole with butter, about 1-2 tablespoons. Season with salt and pepper.
- Place the filled onion on a sheet of foil large enough to encase it.
- Wrap the onion in foil, bringing the edges up in the center. Twist the foil together to seal the onion in. Place the foil-wrapped onion on a baking sheet.
- Bake for 45-60 minutes, until the onion is tender. Serve warm.
Love this recipe? I’d appreciate it if you could scroll down and add a *5 star rating* to help others know they’ll love it as well!
Notes
*We’re using a standard-sized 4 gram bouillon cube here, not extra-large ones. You can cut large ones smaller as needed. If you’re using granulated bouillon, use 1 tablespoon. Alternatively, you can use 1 teaspoon of your favorite seasoning blend. Note that if the blend doesn’t contain salt, add 1/4 teaspoon of salt.
Disclosure: This post is sponsored by the Vidalia Onion Committee. All opinions are ours and honest.
This post originally appeared in August 2016 and was revised and republished in June 2023.


Baked six Vidalia onions using this recipe. I retained the pieces of onion removed from the center of the onion and placed them on a piece of foil, too. I sprinkled with salt and pepper and a pat of butter and baked the debris along with the onions. That, too, was perfect. When I posted pictures of my baked onion endeavor, I received several requests for the recipe from friends and gladly sent the link to your site.
Thank you for your recipe!
That’s wonderful to hear, Sheila! Thanks so much for sharing the recipe. 🙂
Kids and I loved this recipe. So easy-followed exactly and came out absolutely perfect as a picture and delicious. Have already passed it along to friend and sister. Thank you
That’s wonderful, DV! Thanks for passing it along!
My husband suddenly harked back to baked onions from his childhood, which I had never seen or heard of…so he bought some very large round onions (I have no idea if they were Vidala or not) and I followed this recipe. As we were going out I did it at 150 degrees Farenheit over about 3 hours. It was fabulous and the liquid was a great taste additive compliment to the main dish. I used the chicken stock cube. This will certainly be done again! SO simple.
That’s wonderful, Miranda! So happy that you both enjoyed.
Love this recipe! If you don’t like the beef buillion cube try wrapping a single slice of bacon around the outside before foiling it up,!
Thanks for the tip, Lynn! Enjoy!
All I have is butter, salt and pepper. Should I used a dash of garlic salt?
I think you can use pepper and garlic salt in place of the bouillon cube, Patty. I haven’t tried it but it should work.
If making this for A large is the serving size one whole onion or can you half or fourth
The onion?
The nutritional information provided is for a whole onion as one serving. Of course, you could halve or quarter it to serve if you’d prefer, Sylvia. Enjoy!
I Purchased four big onions of unknown nature and am praying they are not too hot, thanks for the post. Need roasted radish recipe. Do you have one?
We have instructions on roasting radishes in this recipe – https://thecookful.com/farro-and-roasted-radish-salad/
Hope you enjoy, Genny!
So easy….I cook it up a notch using freshly grated nutmeg, before sealing in foil, I pour a good sherry . Then wrap tightly…..
Wow, that sounds wonderful, Caroline!
I love this recipe. I add a small splash of Worcestershire sauce. Just wonderful.
Thanks, Chuck! Love the Worcestershire idea too!
LOVE THESE, Look forward to the Vidalia’s coming out every year. Have been making them for decades bec my mom saw this recipe in a magazine and made them when I was young. I prefer to use Beef Bullion because it has a stronger flavor. I have never crumbled the cube, just pushed it into the hole and topped with butter. We prefer to cook them on the grill for an hour, but have done them in the oven as well. BTW, these made GREAT hostess gifts if you are going to someone’s home for dinner or a cookout.
MaryBeth, I love them too! So happy you enjoy the recipe.
Given the taste comparison to French onion soup, would this work with gruyere cheese as an addition?
Philip, That would be delicious!
Could not pull up recipe for baked Visalia onions. Please send immediately.
Thanks
Martha
You don’t need to crumble the bullion cube (and probably shouldn’t). Fresh vidalias have so much moisture in them – and the butter packed on top – makes is dissolve over the cooking time.
Wes, thanks for the info!
How do you soften the bullion cubes? Mine are hard as rocks. Thanks.
Patricia, You could try pounding down on it. Put it on the counter and then hit it with a rolling pin, gently at first and then more if needed.
Just cooked this using a sweet onion ( not Vidalia) and it turned out amazing. Reminded of French onion soup in just a little over an hour total time. Thanks for posting it. 😁
Andy, So glad you liked it! I’ve never tried it with other kinds of sweet onions but now I will!
This does make the perfect delicious onion in the oven. There are other websites that steer you in the wrong direction but you’ll be very pleased with this. It’s so easy to make and it’s delicious!
Thanks, Steve!!!