
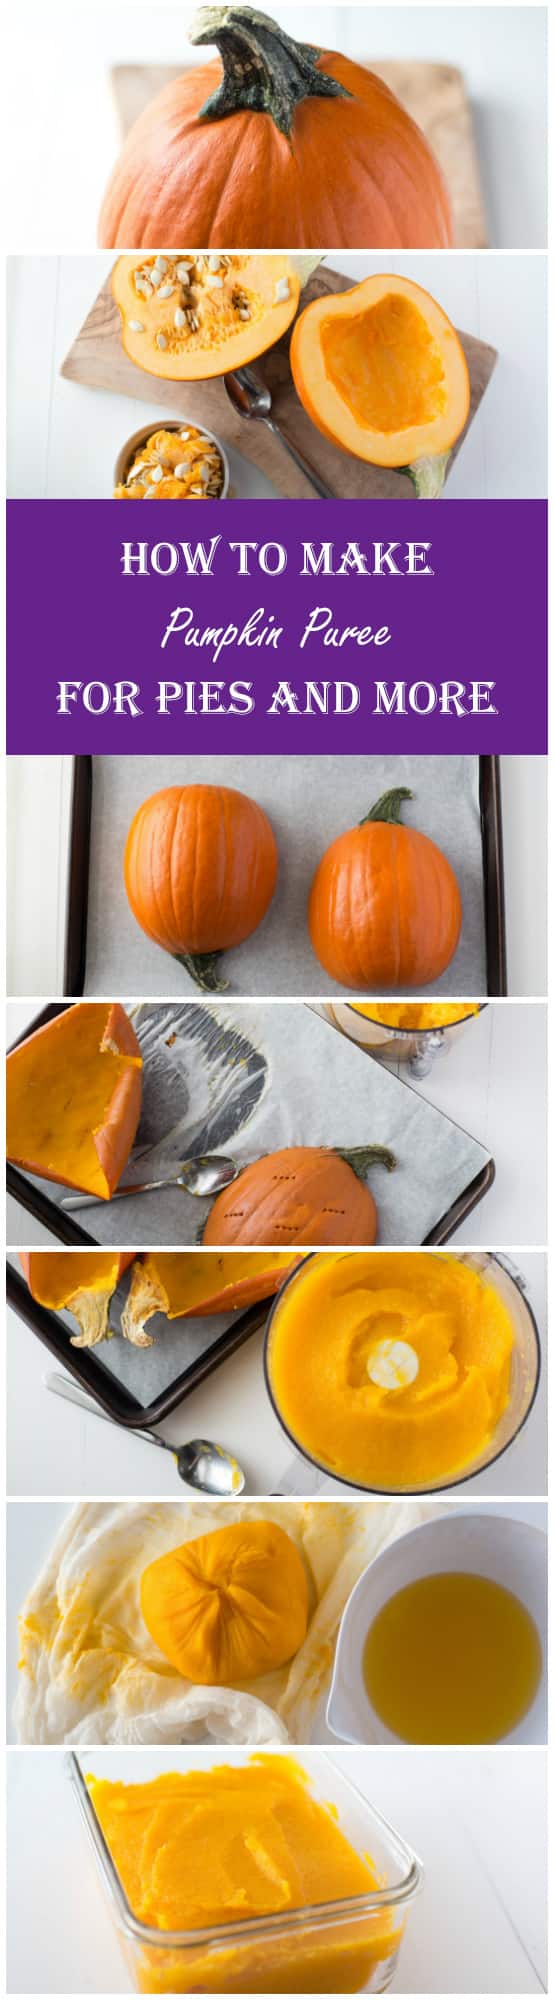
Prepare Your Own Pumpkin for Pie

Skip the can this year and make your own pumpkin puree. You’ll have to carve out some time for it, but you can bake the freshest of the fresh pumpkin pie. Look at you, you awesome pie baker.
Draining the excess liquid from the roasted pumpkin is the key to success here. The goal is to get it as thick (or thicker than) the stuff from the store. I’ll show you how, and give you all the help you need to get delicious fresh pumpkin for your pies and baking delights.

Video: How To Make Homemade Pumpkin Puree
Type of Pumpkin for baking
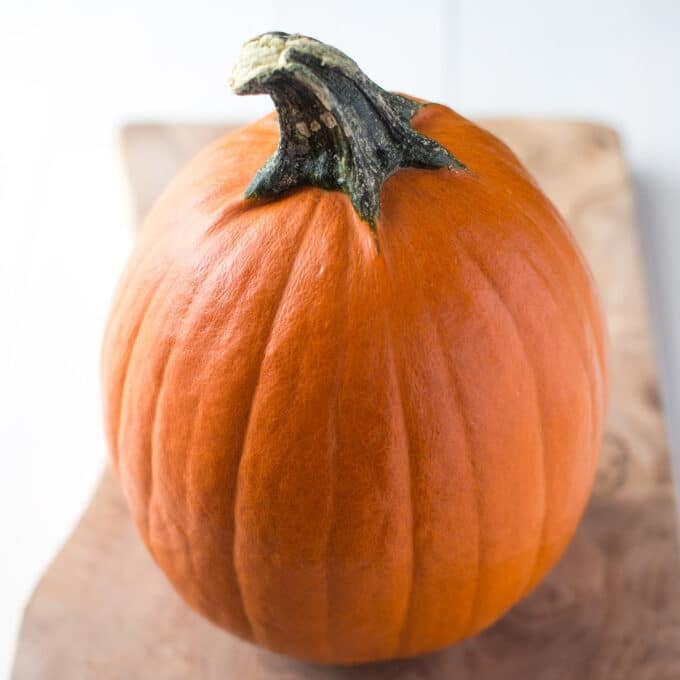
Choose a pumpkin that feels heavy for its size. Also, you want one that’s labeled “sugar” or “pie” pumpkin. They’re smaller than their carving cousins and they have more flesh inside. This is what a pie pumpkin looks like:
Cut and Prep the Pumpkin
Slice the pumpkin in half lengthwise (that’s stem to base). I kept my stem on, but if it’s easier for you, you can chop the very top of the pumpkin off first.

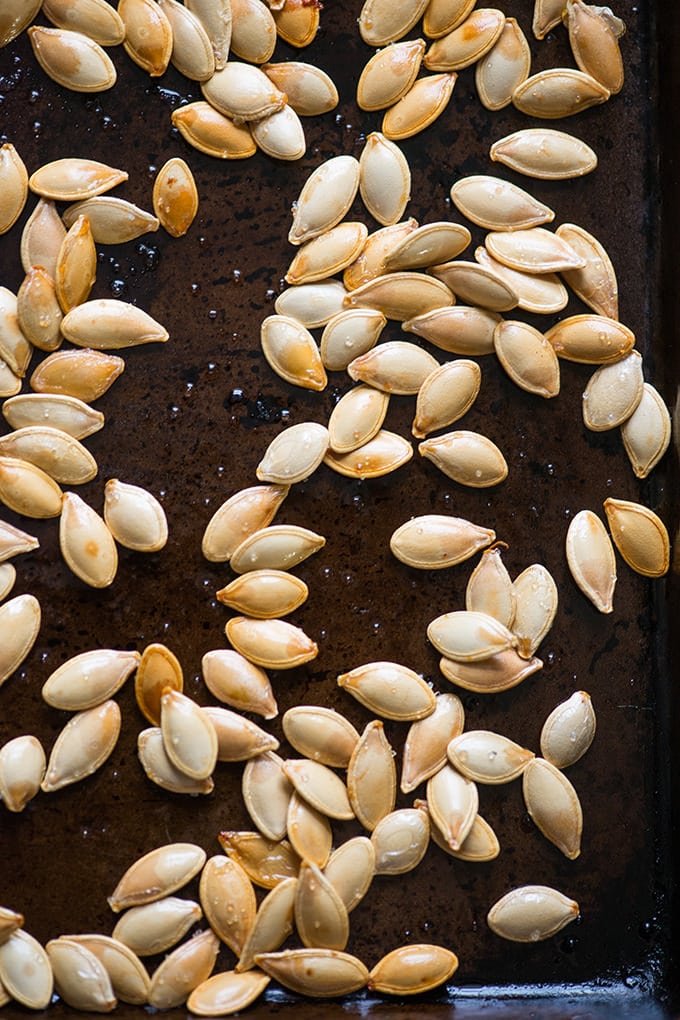
Use a spoon to scoop out the seeds and stringy “guts” from the inside of the pumpkin and set them aside. You can use those later for roasting pumpkin seeds, so don’t throw them out.

Bake the pumpkin
Line a baking sheet with parchment paper, a silicone baking mat, or foil. Place your pumpkin halves cut side down on the baking sheet. Bake at 375°F for about 45 minutes.

You should be able to pierce through the pumpkin easily with a fork, see the prick marks I did for testing mine below.
Pureeing the Pumpkin
Let the pumpkin cool for about 15 minutes so you don’t burn your hands, then use a spoon to scoop out the flesh, leaving the skin behind. Place the flesh into the bowl of a food processor (a good blender would work, too).

Put your food processor to work. Start by pulsing the pumpkin in the food processor. You may need to scrape down the sides every now and then. Keep pulsing until it is relatively smooth. Scrape down the sides of the bowl and let the food processor run for about a minute more to really smooth things out.
Important tip: Resist the urge to add water; once the pumpkin flesh starts to break down, it will release liquid and be easier to process. Our goal below is to remove water from the puree, so adding any now makes things harder later.

Strain the puree to thicken it for pie
Rest a fine mesh strainer over a large bowl. Line the fine mesh strainer with cheesecloth. Add the pumpkin puree to the lined fine mesh strainer and let it drain for 1-2 hours, until the pumpkin is thick and holds its shape when pressed together in the cheesecloth. When you unwrap it, it’ll look like this:

Using And Storing Your Pumpkin Puree
Use your pumpkin puree any way you would use canned pumpkin puree. One 15-ounce can of pumpkin is almost exactly 2 cups worth (it’s short by about two tablespoons). So for most recipes you can use 2 cups when it calls for a 15-ounce can. A 29-ounce can of pumpkin has about 3 and 1/2 cups in it.
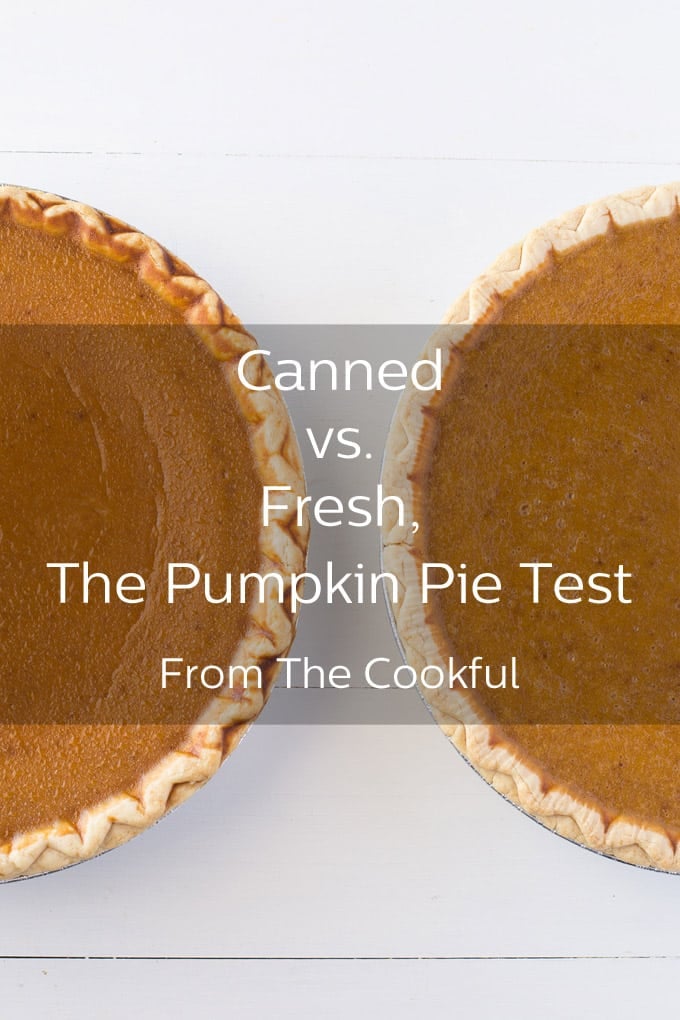
Try using your own pumpkin puree in our classic pumpkin pie recipe. This thick puree really is especially good for pies, including our Bourbon Pumpkin Pie recipe. You could also turn it into Pumpkin Pie Oatmeal Bars for something different.
Store any puree that you don’t use immediately in a covered container in the refrigerator for up to 5 days, or freeze it for 3 months. It might get more liquidy from freezing and you will probably need to strain it through cheesecloth again.

Podcast Episode: Making Pumpkin Puree
Listen to our editor, Christine Pittman, explain briefly how to make this pumpkin, with some great tips along the way, by clicking the play button below:
Listen to more Recipe of the Day episodes here.
Print
Prepare Your Own Pumpkin for Pie Recipe
- Prep Time: 30 minutes
- Cook Time: 2 hours
- Total Time: 2 hours 30 minutes
- Category: Side Dish
- Method: Baked
- Cuisine: American
DESCRIPTION
The most important tip here is to make sure you don’t add water when processing your pumpkin, and then be sure to strain it really well later. That is how you end up with THE BEST pumpkin puree for pumpkin pie, and other uses too.
Ingredients
- 1 medium sugar or pie pumpkin
Instructions
- Pick out your pumpkin. You want one that’s labeled “sugar”or “pie” pumpkin. They’re smaller than their carving cousins (see the picture up above), and they have more flesh inside. Choose a pumpkin that feels heavy for its size.
- Preheat your oven to 375°F. Slice the pumpkin in half lengthwise (that’s stem to base). I kept my stem on, but if it’s easier for you, you can chop the very top of the pumpkin off first.
- Use a spoon to scoop out the seeds and stringy “guts” from the inside of the pumpkin and set them aside. You can use those later for roasting pumpkin seeds, so don’t throw them out!
- Line a baking sheet with parchment paper, a silicone baking mat or foil. Place your pumpkin halves cut side down on the baking sheet. Pop the pan into the oven for about 45 minutes. You should be able to pierce through the pumpkin easily with a fork.
-
Let the pumpkin cool for about 15 minutes so you don’t burn your hands, then use a spoon to scoop out the flesh, leaving the skin behind. Place the flesh into the bowl of a food processor (a good blender would work, too).
- Put your food processor to work. Start by pulsing the pumpkin in the food processor. You may need to scrape down the sides every now and then. Resist the urge to add water; once the pumpkin flesh starts to break down, it will release liquid and be easier to process. Keep pulsing until it is relatively smooth. Scrape down the sides of the bowl and let the food processor run for about a minute more to really smooth things out.
- Rest a fine mesh strainer over a large bowl. Line the fine mesh strainer with cheesecloth. Add the pumpkin puree to the lined fine mesh strainer and let it drain for 1-2 hours, until the pumpkin is thick and holds its shape when pressed together in the cheesecloth. It’ll look like this:
- Use your pumpkin puree any way you would use canned pumpkin puree. Store what you don’t use immediately in a covered container in the refrigerator.
Love this recipe? I’d appreciate it if you could scroll down and add a *5 star rating* to help others know they’ll love it as well!
This article originally appeared in November 2015 and was revised and republished in August 2024.


What do I do with the seeds?
We’ve got tons of ideas for those pumpkin seeds, Karen! Learn how to roast them with all sorts of flavours here – https://thecookful.com/category/pumpkin-seeds/
You do have a crust recipe you’re a kitchen goddess!!!!!
Made this and used a coffee filter inside a mesh strainer in my fridge (no cheesecloth didn’t want to buy any) and skipped the blender (again I don’t own one) and I have no idea what cardimum is so that was also skipped but I did add the cloves cinnamon and nutmeg and it was delicious. Making another pie (Canadian Thanksgiving this weekend) with this recipe because yours is to die for. now if you can make my pie crusts less ugly… great recipe
Thanks for sharing your tricks with us, Michelle! Sounds wonderful!
Thank you! I ended up with extra batter so I made tartlets. I still had a little remaining batter so I mixed with a package of cream cheese, an egg, heavy cream, vanilla and sugar to make pumpkin cheese tarts. Turned out perfectly! This recipe is very adaptable, and love the cardamom twist. Thanks for sharing 👍
That sounds delicious!
How long does the unused puree keep in the fridge?
If you won’t be using it within a week, I suggest freezing the remainder, Christine. It freezes and thaws out nicely!
i was wondering also if the puree can be frozen?
Yes, it can Kathy. I included more details in my reply to Sherry. Have fun with all sorts of pumpkin recipes!
Can I freeze the purée that is not used for my pie?
TIA
Absolutely, Sherry! I usually put a cup or two each in freezer bags so I can thaw the perfect amount when I need it. Then you can enjoy pumpkin treats for months after you’ve cooked down your pumpkin! I would try to use it within 6 months.
I never strain mine and ithe turn out great!
Great to know, Deborah. Saving a step always makes things easier!
I’m wondering that too. Thinking about using some of it in place of water in stock? Was kind of hoping I could turn it into some amazing sauce but I haven’t been brave enough yet.
You can just use the mesh strainer, just don’t push too hard. Or if you have a cotton kitchen towel that will work too, not the textured kind (I hope that makes sense lol).
Great ideas, Monica! Thanks!
Thanks for taking the time to make such clear directions! Now I’m wondering if there’s anything you can do with the leftover liquid strained off the puree.
I don’t have a cheese cloth, what could I use instead?
Cooked purifued and drained pumpkin..now how much do I need for a 9 inch pie
Andra, there are 2 cups of pumpkin in a 15 ounce can. So if you use a recipe like this one that calls for a 15 ounce can https://thecookful.com/classic-pumpkin-pie/ then you would use 2 cups of your pumpkin puree.
I have the pumpkin in the oven right now! Question: Can I strain the pumpkin in the fridge for food safety issues rather than leaving it out on the counter. It shouldn’t make a difference should it?
That will be fine, yes.
Thank you so much for the step by step instruction for making pumpkin pie filling from home grown pumpkins. I didn’t know you can use the pumpkins for Jack-o-lanterns to make pies, bread and cookies. Again thank you very much!! HAPPY FALL!!!
Thank you for the step by step instructions. They will be very helpful. I have been w