
How To Bake Chicken Wings That Are SOOO Crispy

For baked chicken wings that are perfectly crispy, you need our three-step method that’s loved by hundreds of thousands of cooks, cooks who come back here over and over again to make them. It’s the best chicken wing recipe ever!
Good news! You don’t have to deep fry wings in order to end up with deliciously crispy chicken. You can easily make trays of wings for game day in the oven with my crispy baked chicken wings recipe. A little bit of baking powder and a two-step baking method gives you delicious wings without a lot of effort.
Scroll down to read more about how it all comes together or click here to jump straight down to the recipe.
- Video: How To Make Crispy Oven Baked Wings
- Why Bake Chicken Wings?
- Why These Baked Wings Are SO Crispy
- Why Use Baking Powder?
- Can You Use Baking Soda Or Cornstarch?
- Time and Temperature for Baked Chicken Wings
- How To Bake Chicken Wings So They’re Extra Crispy
- Seasoning The Wings
- Sauce For Baked Wings
- Even Better Crispy Chicken Wings?
- More Chicken Wing Recipes
- Podcast Episode: Baking Chicken Wings
- Crispy Oven-Baked Chicken Wings Recipe

Video: How To Make Crispy Oven Baked Wings
Here’s a short video showing the three-step baking powder method for making crispy baked chicken wings. You’ll see the three steps in our process: (1) baking powder, (2) low temperature, (3) high temperature.
Why Bake Chicken Wings?
There are several factors that influence how you might choose to cook your wings. Here are the reasons that you might want to bake yours.
- You want a lot of wings. You can fit a lot more wings on a pan in the oven than you can in an air fryer or in a pot for deep frying. This means you can make a lot at once without working in batches!
- You want a hands-off process. Once they are in the oven, you don’t need to move them around or flip, making it super easy.
- You want crispy skin! With my baking method, you get wonderfully crispy chicken skin with very little fuss.
You can see in this How to Cook Chicken Wings post that we compared different ways of cooking chicken wings and baking is best for cooking for a crowd and the best option for crispy skin other than deep fried chicken wings.
Why These Baked Wings Are SO Crispy
These chicken wings are seriously so crispy, you’d think they were deep-fried. There are three reasons why they give you that crunch:
- They use a small amount of baking powder which helps crisp the skin, see more about why this happens below.
- They are baked at a low temperature first to really dry the skin out and to give the baking powder time to start working.
- High heat at the end to finish cooking the wings and to really brown and crisp the skin.
“My son says they’re as good as from his fave wing shop!”
Melody, TheCookful reader
Why Use Baking Powder?
Baking powder is a leavening agent usually used in baked goods such as cookies and cakes. It’s a mixture of sodium bicarbonate, cream of tartar, and cornstarch. But interestingly, when mixed with salt and dusted on chicken, after cooking, the chicken skin is extra crispy. Why does this happen?
It happens because baking powder is alkaline (the opposite of acidic). The addition of the baking powder therefore raises the pH level in the chicken, allowing the peptide bonds in the skin to break down, which in turn lets the skin get more crisp and brown.
You can also use this method with other cuts of chicken, like these amazingly crispy Baked Chicken Drumsticks. And, I’m going to tell you below how adding baking powder to a wet brine mixture can also get your crispy chicken skin.
Use Aluminum-Free Baking Powder
Note that while most of the comments below this post are very positive (people seriously love this method of baking crispy wings!) a couple of commenters noted a bitter taste on their wings. I at first thought that they were using baking soda instead of baking powder. Doing so would definitely lead to a terrible taste. However, they claimed that they were really using baking powder for sure. I was stymied until another helpful commenter posted this link showing that some people are sensitive to a flavor that is found in some brands of baking powder.
Baking powder that contains “sodium aluminum sulfate” has a bitter taste to some people. If you notice this flavor, you’ll want to try a different brand of baking powder. The Rumford Brand is aluminum-free, so that’s one to try. And note that Rumford is not a sponsor of this post or anything like that. We just know for sure that they are an aluminum-free brand.
Can You Use Baking Soda Or Cornstarch?
Baking soda is NOT a good substitute for baking powder. While baking powder does contain baking soda (sodium bicarbonate), baking soda alone is stronger and has a very metallic taste if used without being neutralized with an acid. The cream or tartar found in baking soda is acidic and neutralizes that taste.
In the comments below this recipe, several people have asked if they can use cornstarch instead of baking powder. While people do use cornstarch on their wings to make them crispy, it works in a different way. Baking powder changes the pH of the skin so that the skin itself gets crispier. On the other hand, when you put cornstarch on wings, it’s the cornstarch coating itself that is toasting and crisping.
Therefore, my answer is that you can use cornstarch on wings, but not as a substitute for the baking powder in this recipe – it won’t work the same way and the amounts would not be equivalent.
Time and Temperature for Baked Chicken Wings
We start at the low temperature of 250°F for 30 minutes to dry out the wings.
Then, without removing the wings from the oven, increase the temperature to 425°F and bake for 40-50 minutes more. This cooks the chicken through and browns the wings to crispy perfection. If your wings are smaller than average, you will likely only need to cook them for 30 minutes at this step.
How To Bake Chicken Wings So They’re Extra Crispy
Prep and Season
If you have whole wings, you can learn how to cut chicken wings here. (When you cut ten wings, you end up with 30 wing pieces. That’s 10 drumettes, 10 flaps and 10 wing tips. You’ll either discard the wing tips or save them for another use. That leaves 20 wing pieces that you’re using here.)
Note: You can leave the wings whole if you prefer and it won’t affect the cooking time. I think they area little more awkward to eat though. You also can leave the wing tips attached to the flap, but there’s so little meat on there that they aren’t the best to eat.
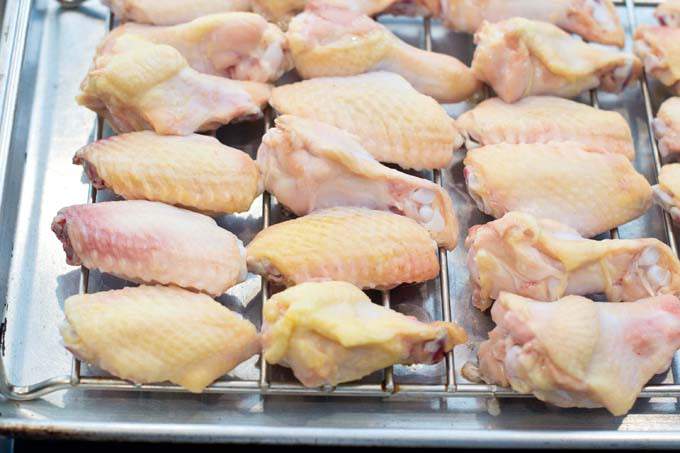
Once they’re all cut up, put them into a big bowl. Sprinkle with 1/2 teaspoon of salt and 1 tablespoon of aluminum-free baking powder (and NOT baking soda!). It doesn’t seem like much but you’re not trying to make a coating for the wings here. You’re trying to change their pH level so that they will crisp up better. Mix it up, I usually just toss it around or get in there with my hands.
I’ll also say that I am somewhat of a perfectionist and so to get a really even coatingthat is dispersed well on the wings, what I usually do is to put half of the wings into the bowl, sprinkle with half of the salt and baking powder, then add the other half of the wings and sprinkle with remaining salt and powder, and then I mix them with my hands. That just reduces the likelihood that the salt and baking powder will be overly concentrated on some wings.
Use A Wire Rack
Line a baking sheet with aluminum foil to make clean up easier. Then set an oven-safe metal rack onto the baking sheet. Spray the rack with cooking spray or lightly oil it to help prevent the chicken from sticking. Place the wings on the rack.
The rack is really helpful for crisping the wings because it allows air to circulate all around the chicken pieces so that they get evenly crisp. It also lets the fat drip away from the chicken so they’re not sitting in pools of fat, which will also reduce crispiness.

Start at a Low Temp
Place the chicken in a 250°F oven for 30 minutes. This gets some of the fat rendered from under the skin and starts that drying out process. Here’s how they look after 30 minutes. These are not cooked. Do not eat them yet.
Finish with High Heat
Leave them in the oven and crank the heat up to 425°F and cook 40-50 minutes more, until golden brown and so crispy. If your wings are smaller, skinnier ones, you will likely only need to cook them for 30 minutes at this step. If they’re crispy on the outside and their internal temperature on an instant read thermometer is 165°F, they’re done.
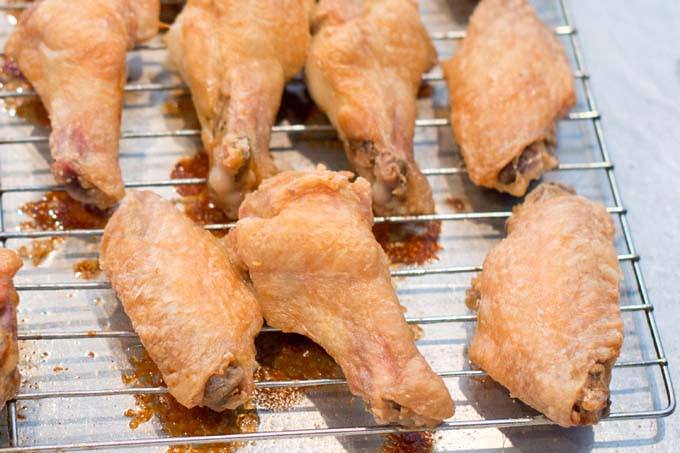
Note that a lot of people’s ovens aren’t calibrated well and usually run a bit lower than is displayed. If your wings are not browned well after 40 minutes, increase the heat to 450°F or even 475°F to get a final bit of browning on them.
In general, I highly recommend getting an oven thermometer that sits in your oven and tells you the actual internal temperature. They’re inexpensive and very useful if you’re trying to perfect your cooking. They sell them at a lot of grocery stores, and you can also get one on Amazon here.
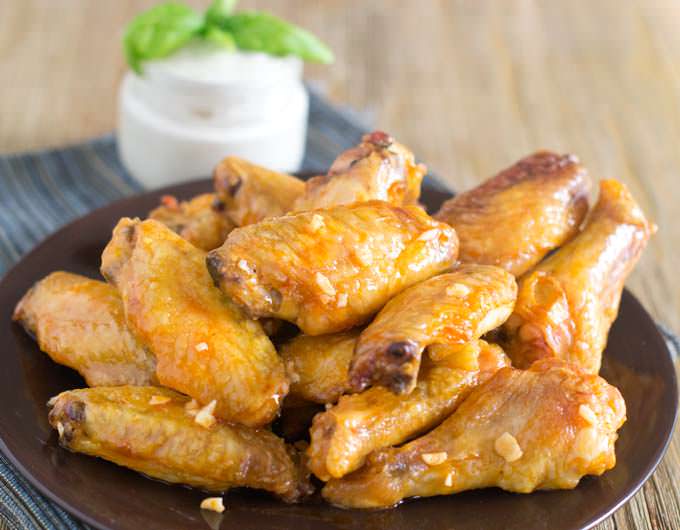
Seasoning The Wings
You can season them before baking, but sometimes some spices burn from the high heat. I therefore prefer to toss them with just the salt and baking powder for baking and then add flavor with a spice blend and/or sauce after.
Having said that, this wing dry rub contains baking powder and great seasonings and works beautifully – these spices don’t burn.
After baking, my favorite is really just adding more salt, pepper, and garlic powder. Use regular fine salt, which is more likely to stick to the wings, not kosher or anything thick here. A bit of tajin seasoning thrown in is always good too! Or try these seasoning blends that are great on wings. And yes, pizza seasoning is one of them and is my kids’ favorite on crispy baked wings!
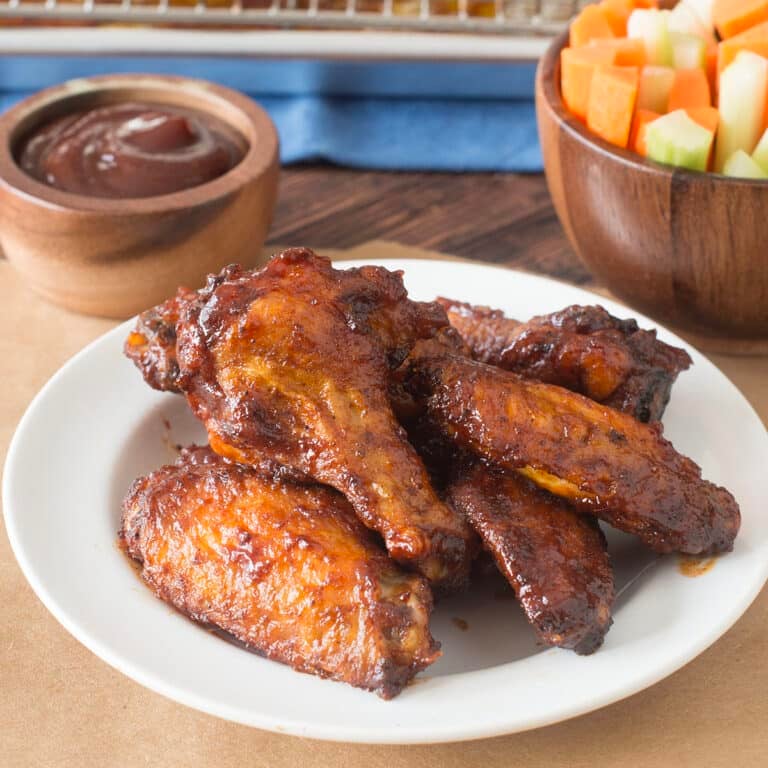
Sauce For Baked Wings
These wings are so crispy that I find it a shame to add moisture to them and lose any of the crispiness with a sauce, but if you must toss them with a sauce…
This easy decadent homemade Buffalo sauce will blow your mind or grab some BBQ sauce.
And then you’ll need a great dip, like ranch or blue cheese dressing. I prefer ranch dressing. You can grab a bottle at the store, make your own with fresh herbs like this, or make homemade ranch seasoning with ingredients from your pantry and stir together 1 cup of sour cream with 1 tablespoon of the seasoning. It’s so fresh-tasting and delicious!
Even Better Crispy Chicken Wings?
I have to tell you something. So it is absolutely true that the recipe below, the one I’ve been telling you about so far, is the one I’ve been using for over 15 years and is the one that everybody raves about it. I love it and my readers keep coming back and making it over and over. I still stand by it and it is still the same recipe down there that it has always been.
However, recently, I’ve started doing things a little differently at my house. I’ve started brining the wings in a mixture of water, salt, and you guessed it, baking powder. Why?
- The baking powder flavor is undetectable with the brine method.
- The chicken wing meat gets nicely seasoned right though from the salt brine, so much flavor.
- I swear, the skin is even crispier! It even kind of bubbles up in places as though it’s deep fried.
So, if you want to try something new, head over to my new crispy baked brined chicken wing recipe.
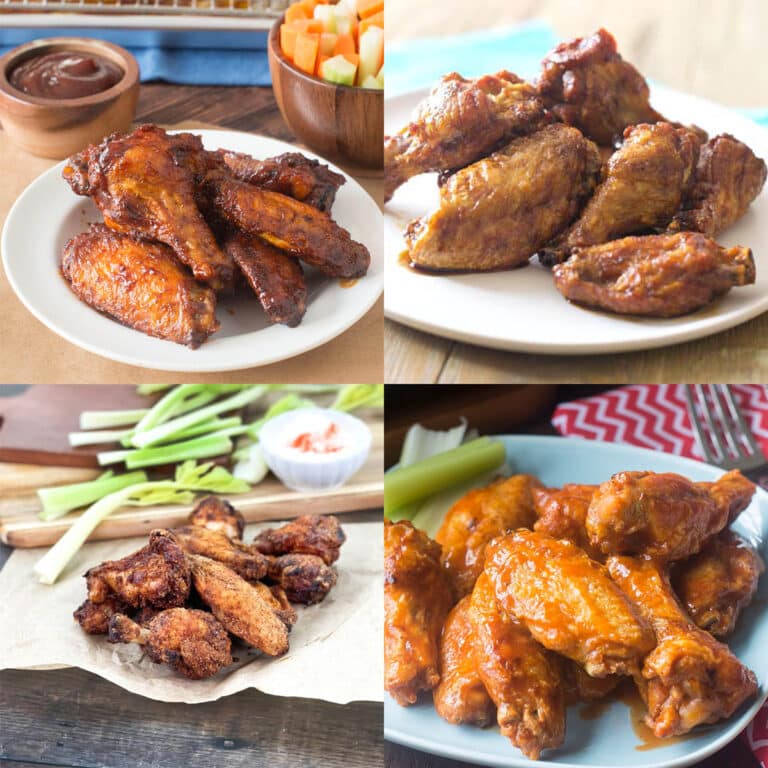
More Chicken Wing Recipes
If you haven’t guessed it already, I’m obsessed with chicken wings. Here are all of my chicken wing recipes for you to browse through. If you specifically want to bake wings but with a different flavor, try our Zesty Lemon Pepper Chicken Wings! They are baked with baking powder, salt, and lemon pepper seasoning, and then have fresh lemon zest and cracked pepper added at the end, which is so crazy-good! Or, if I haven’t convinced you that baking is the way to go, here are some other ways to cook your wings:
Podcast Episode: Baking Chicken Wings
Listen to me explain briefly about how to make this recipe, with some great tips along the way, by clicking the play button below:
Listen to more Recipe of the Day episodes here.
Print
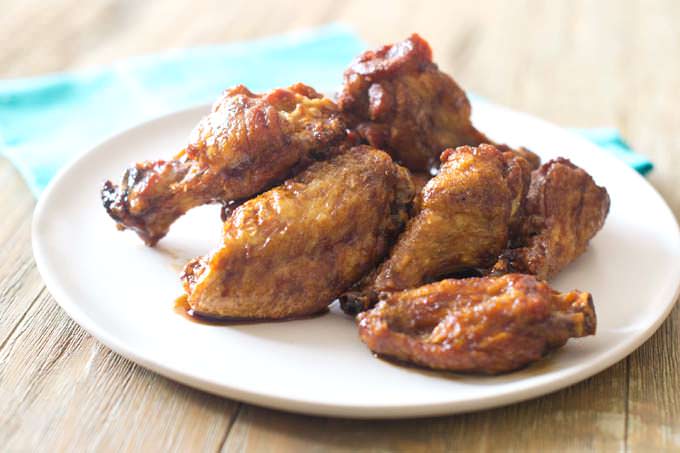
Crispy Oven-Baked Chicken Wings Recipe
- Prep Time: 5 minutes
- Cook Time: 1 hour 20 minutes
- Total Time: 1 hour 25 minutes
- Yield: 20 wings 1x
- Category: Entrée
- Method: Baked
- Cuisine: American
DESCRIPTION
For perfectly crispy baked chicken wings, you need our trusted three-step baking powder method loved by hundreds of thousands of cooks.
Ingredients
- 10 whole chicken wings, cut into flats and drumettes (here’s how to do it). Discard tips or use for a stock. That leaves you with 20 wing pieces total
- 1 Tbsp. aluminum-free* baking powder (NOT baking soda)
- 1/2 tsp. salt
- Sauce or dry rub
Instructions
- Preheat oven to 250°F.
- Line a cookie sheet with aluminum foil. Place an oven-safe rack on top of cookie sheet. Spray rack with cooking spray or lightly oil it.
- In a large bowl, use your hands to toss the flats and drumettes with the baking powder and salt until chicken is evenly coated. But do not add extra baking powder, just mix them so they all have some.
- Place wings on the prepared rack in single layer. Transfer rack with the cookie sheet under it to oven and cook for 30 minutes. This baking at a low temperature dries the wings out and allows the baking powder to penetrate.
- After 30 minutes, leave the wings in the oven but raise the heat to 425°F. Continue to cook until brown and crispy, 40-50 minutes.**
- Take wings out and let rest 5 minutes. Toss in a delicious sauce like this one and serve.
Love this recipe? I’d appreciate it if you could scroll down and add a *5 star rating* to help others know they’ll love it as well!
Notes
This post originally appeared in January 2016 and was revised and republished in December 2024.


So…I am having a hard time following directions today. I coated the wings with salt and baking soda and stuck them in my 250 oven…a few minutes into baking i was going over the recipe and realized it says baking powder not soda! So i grabbed the wings from the oven, rinsed them and redid with baking powder this time…lol
Still in the oven, but im exctied to try these!
Update…
These turned out to be awesome! This will definitely be my go to wing recipe!
Renee, Fantastic! Thank you so much for letting us know!
Oh ha! I just saw this. So you did it with soda first then rinsed and used powder. The soda actually has the same effect as the powder but it can leave a bad taste on the wings. Good job catching the mistake and correcting for it. Again, so happy they turned out for you!
OMG…..you are a Chicken Wing Goddess…totally works….and I’ve tried lots of methods. Not sure how you came up with baking powder but wow …..thanks
Robin, Thanks so much for letting me know that you liked out they turned out. It is pretty amazing, isn’t it?
Yes yes yes! Finally it works and love them!
Yay!
Can I use flour instead of baking powder? My husband has a very strange reaction to baking powder.
Alayna, No, unfortunately you can’t. The reason for using the baking powder is to change the Ph level of the chicken, not to bread it. You can use baking soda, but less of it. And it actually has an odd salty metallic taste so you may end up not liking that.
If there is something about baking powder your husband doesn’t like, figure out if it’s the baking soda in it, the corn starch, or the cream of tartar. You can get cream of tartar at a bulk food place, and mix in the baking soda yourself if you want to avoid the corn starch for a lower carb recipe, for instance.
I’m making these now and it smells amazing can’t wait to try them my husband loves chicken so I hope he loves these thanks for the recipie
You’re welcome!
They are delicious! Making them for the third time tonight. Trying a little seasoned salt tonight along with the baking powder. Then I’ll toss in some special sauce. Thank you for my favorite wing recipe.
Charlie, You’re welcome and thanks for letting me know that you like them so much! You’ve made my day!
I tried this recipe and I am blown away by how good the wings came out. Thank you so much. I cant believe what came out of my own oven. Delicious.
KD, Thanks for letting us know. We love this technique too!
Yep, so right … These are the best deep fried , low fat! Oven wings ever! My son who is a wing expert said that they even smelled deep fries! And that THEY DID,
Fancy, Ha! So happy you liked them!
I don’t have a cooking rack. Is it okay to cook them on a backing sheet?
Melissa, They won’t crisp up on the bottom. I’m not positive it would work but you could try flipping them over halfway through.
Dollar Tree has the cooling racks 2 for a dollar. I stocked up to make jerky, and they work great for these.
The dollar tree! great idea, April. Thanks for the tip!
Your recipe calls for 1tbsp for 10 wings; however, in the picture, it looks like alot more baking powder than 1 tbsp. Can you advise if this is 1tbsp per wing? How does 1 tbsp coat 10 wings or am I missing something?
It really is just one tablespoon. In that picture it’s sprinkled a bit around. Spoon a level tablespoon of baking powder over your bowl of wings. Add the salt too. Then toss them around until it has been well-distributed. This is not like a breading. This is just a very thin layer that is meant to change the PH of the wings so that they can crisp more easily.
Why do you use baking powder rather than baking soda? As I understand it, baking soda (sodium bicarbonate) is an alkali (so would raise the PH of whatever you add it to) and baking powder is an alkali and an acid (bicarbonate of soda and tartaric acid). So if you are just trying to raise the ph of what you are cooking, wouldn’t it be more expeditious to just add the alkali? ie just baking soda
Great question, Joe! Baking soda has a strong flavor that is detectable on the finished wings. The baking powder, which has baking soda in it and is thus also alkali, but not as much, has much less flavor and is not detectable on the finished wings.
Can these be marinated in sauce overnight first? Or do they have to be dry when the baking powder goes on? And could cornstarch be added to the baking powder mixture, or would that ruin it?
Sorry if these are all really obvious questions, I’m very new to cooking and very uncertain 🙂
Mila, I haven’t tried either of the things you’ve asked so I’m not positive. I think a marinade would work if you drained it off and then patted the wings very dry before adding the baking powder and salt. I’m not sure what cornstarch would do, to be honest. If you want to try it, I’d say make a batch as explained above but then put some cornstarch in with just a few of the wings. THen you get wings that turn out correctly for sure, and on the side a little test batch to see.
I coat them anddry them on the racks overnight gives them the right chewiness and more like fries wings.
Randy, That’s interesting. So you coat them in the baking powder and salt mixture and then dry them overnight? Or you coat them in something else?
If you happen to use a silicone baking item called the pyramid pan, you will want to flip them part of the way through the final cooking phase so both sides get crispy. I couldn’t seem to find baking racks at the stores near me for some reason, so I went with what I could find. Great cooking method though. Reminds me of the wing joint without all the grease.
Great tip, Philip. Thank you!
Question for you?
do you have to flip the wings over at all?
No. Just leave them as they are on the rack.
Hello, I normally bake my sauce on the wings at the end, would that make them less cripsy?
Dawn, it might make them less crispy. I typically toss the wings in a bowl with sauce after baking them. You can warm up the sauce a bit in the microwave or not. It doesn’t seem to matter.
I don’t have a rack but I want to try this. Will it make a huge difference?
Anesia, I don’t think it will make a huge difference. Maybe flip them over halfway through so that the bottoms aren’t soggy.
You can wrinkle up some foil so it holds them up out of the fat like a rack. Another method I have used is to use two baking sheets of different sizes. Turn the smaller upside down in the larger so the fat can run off. My third method was a quick run to get a rack. lol
In the oven right now! I forgot to put on the bottom rack for the first 30 , but the house smells great. I have about 10 minutes to go at 425°, so excited. I love crispy wings and deep frying, but the aroma remains in the house for 2-3 days. So mama and I are getting ready to experiment. She likes honey BBQ, and I like Texas Pete or Frank’s with. Bleu cheese. Update you soon!!
Just made these. I was skeptical at first. But tried it and what do know! I will be doing this process from now on. Glad I tried it. Thank You.
You’re welcome. So happy you liked them. It’s pretty amazing, right?
Can you double or triple the amount of baking powder and salt per 10 wing? Say I have 30 wings I need to cook can I use three tablespoons baking powder and one and a half teaspoon of salt for all of those and can I use my seasonings in addition to the baking powder and salt?
Karen, Yes. Just make sure that you’re talking about 30 whole wings. You’ll cut each one in half so you end up with 60 pieces. If you have 60 pieces, then yes, 3 tablespoons of baking powder and 1 and 1/2 teaspoons of salt. You’d need a very big bowl to get them all in and to toss them well. I’d consider doing half or a third at a time in the bowl just to make sure the powder and salt are distributed. And yes, you can add other seasonings.
Cannot open recipes
Marsh, the recipes don’t need to be opened. They’re already there. If you’re on a mobile device, sometimes you need to click “Read more” in the blog post to get to the recipe.
Loved this recipe. Shared, now my daughter and her husband love it.
Best recipe i have found for crispy wings without frying, thank you, my hubby thanks you too!!
You’re welcome!
Must have done something wrong my wings turned out horribly…i shook them in the baking powder, did the rack. & Temp changes, & the times listed..wish i’ d stuck to flour as usual. Very disappointed ~
Sara, I’m sorry they didn’t work for you. Can you explain what was wrong? Most people really love them so it’s informative to find out what can go wrong and try to fix it so others don’t have the same issue.
This was awesome! What a cool trick adding the baking powder! I personally marinated it before hand and added the baking powder into it. It came out great! Very moist, not overdone, and so yummy….I’ve never been able to get the chicken that crisp in the oven!!! And not burnt!!! That’s even more important! Thanks again!
Penni, Isn’t it the coolest thing? We couldn’t believe how crispy they got either. So happy you liked them!
Do we cover the chicken while it’s baking with aluminum foil
Cory, no, do not cover it.
I followed the recipe exactly and was worried about cook time because the wings I had looked a little puny in comparison to these.
Nevertheless, they were -amazing-. They coating is thin and not a thick, batter like coating that you would get at a restaurant. I’m not sure I would able to tell the difference between these and “naked” wings from a restaurant except for the fact that these wings were really moist.
I really enjoyed them and look forward to using the same baking-powder trick for other proteins.
I used Canadian NO NAME brand Baking Powder.
Danielle, Yes, the coating isn’t meant to be a breading or batter. There’s very very little of it. The coating is just meant to change the ph level of the wings so that they crisp better. I’m really glad you liked them!
Christine – I can’t wait to try this – we love wings. Can you help me with the problem I have every time I try to bake chicken. My kitchen becomes a smoky mess. I can only make them in the summer so I can open all the windows and doors to get rid of the smoke. I hope you have an answer for me soon so I can try your crispy trick. Thank you so very much for your help,
Sandy, I’m really not sure. It is possible that there is food or grease on the burners in your oven. If this is the case, then they need to be cleaned. You might also want to get a free-standing thermometer for your oven so you can see if the temperature is correct.
I put a layer of salt under the rack. It catches the drippings and grease. No smoking.
Torrie, Great idea! Thanks for sharing!
Hi Sandy!
I always have the same problem (definitely not because my oven is unclean). The way around that I’ve found is to use a deeper pan beneath the wire rack and place parchment paper (or something else that won’t conduct too much heat and can stand up to the temperature) between the rack and the bottom of the pan. You have to make sure that the parchment paper doesn’t actually touch the bottom of the pan though as it’s more likely to burn then. This way the fat collects on the paper Instead of the hot metal pan. In my case, the rack holds the paper in place, but if that doesn’t work for you, I’m not really sure what to suggest. Hope this helps!
Thanks for the advice, Dominick!!
Can you please tell me if anyone has ever tried this on chicken legs or breasts? I tried it on legs last night because I LOVE the wing, but I didn’t have the recipe in front of me and I put way to much baking powder. I had to take the outside off completely but I really want to know how much to use. Thank you so much for a wonderful recipe!
Tami, I did see it somewhere in the comments. I tried it on thighs once and it wasn’t ideal. I keep meaning to try again.
I tried this on both drumsticks and thighs , added a homemade creole seasoning for flavour and they were nice and crispy with a tiny bit of heat . I recommend trying it out on any chicken with skin on , going to try it on chicken breast to see if I couldn’t have the breast stay a little juicier!
Brent, For breasts, I think they will dry out if you cook them that long at that high of a heat. But totally worth a shot! Let me know how they turned out. And so happy the drumsticks and thighs worked!
I tried this with the baking powder, they turned out nice and crispy, took a bite, was horrible, all you could taste was the baking powder, I even smothered with melted butter and h o t sauce, tastes awful
Sheree, Are you sure that you used baking powder and not baking soda? You shouldn’t be able to taste it at all. It just tastes like salt, really.
I used baking powder too. Tasted like baking powder. The wings could have held onto too much baking powder. Maybe using a touch of BP in seasoned flour.
Liane, I’m honestly confused by this. I’ve made them so many times and can’t taste the baking powder at all. I don’t think you’d want to use flour though. The idea is not to coat the wings like a breading at all. The baking powder is just there to change the acidity of the wings. That’s why there is so little baking powder called for in the recipe.
I’ve seen this before! Some people are highly sensitive to the taste of baking powder. Maybe it’s genetics?
https://www2.shaftek.org/personal/writing/baking-powder-and-bitter-taste-january-20th-2007/
Jenny, This is so interesting. Thank you! I wonder if it is genetic. The article you referenced notes that there are two kinds of baking powder. When I get a chance I’m going to do a test with the two kinds and make sure that they both yield the crispy results, check if one tastes more bitter in the final result than the other and then I’ll make a recommendation in the article. I love a good cooking experiment!!
The first time I made these, I accidentally used baking powder with aluminum. The taste is totally different, and very unpleasant (unless you like a slightly chemically, bitter taste). Since then I’ve only used aluminum free baking powder, and the wings are wonderful! It’s very important to get the right ingredient.
Susan, Thanks for letting me know. I am planning on doing a taste test using the two types of baking powder but from what you’ve said, I am pretty sure that there will be a noticeable difference.
I have found that if the wings are wet or too moist they retain too much of the powder. I dry the wings with paper towels and toss with the powder mix in a ziplock bag. They get a very thin coating and you dont notice the baking powder taste at all.
Great tips! Thanks Nick!
Hello, if you are going to do a dry rub on them, would you put it on at the same time as the baking powder and salt or would that not work?
Amy, yes you can. I think if you read through the comments here you’ll see that several people have tried that and been happy with the results.
I made these tonight for the Superbowl. I used the Rumford- Aluminum free brand. They turned out so delicious! Will be making again!
Afton, So happy you liked them!!
Hi
I’ve tried this recipe, and love it. I first found it on another website, and it says to dry the wings well before putting in a bag with the baking soda and shaking to coat. By drying them, they only get a very light covering with the baking soda. I would think if the chicken is too wet, they would take on too much.
Oops, I meant baking powder, not soda 🙂
I tried this last night. It was great!!!!
I have tried a lot of reciepes to get this crispness, finally found the answer. Thanks, I’ll be using this often and sharing Pinterest.
Shelia, Thanks so much for letting us know. Delighted that you liked it and that you’re sharing it. I <3 Pinterest!
Can please send my the recipe on how you marinade your Chicken, how long you marinated it. And what you set your oven to. I’m diabetic and need to find new ways to cook healthier.
This recipe doesn’t involve a marinade. You just start with plain chicken wings.
marinated in what?
I tried this recipe was because I didn’t have the time to deal with the oil and washing the fryer tonight. While I won’t go so far as to say this is better than a deep-fried wing, it was pretty damned good. I started with a Costco (Canada) pack of chicken wings. It yielded me 20 wingettes and 33 drummettes. So I decided to (kinda) follow the recipe at 2.5x. I like a marinated wing – so I marinated the wings with a dry spice mixture using 1 tsp of salt, 2 tsp of large-grind black pepper (Costco restaurant grind), 1 tsp of garlic powder, 2 tsp of paprika, and 1 tablespoon of Club House Italiano seasoning. I coated the wings with this spice mixture and then placed in the fridge for four hours. Just before baking I mixed in 2.5 tablespoons of Magic Baking Powder (which google says is aluminum free).
I also modified the cooking instructions using the convection setting on my oven. I started with Convection BAKE at 250 for 30 minutes, then used Convection ROAST at 400 for 40 minutes.
Overall, I’m very impressed and will definitely try this method again. Next time, I might add a bit more salt (for my taste) and maybe a little heat like some chipotle chili powder or cayenne. My wings were mostly on the smaller side and were done at 40 minutes, I probably could have pulled them out 5 minutes earlier.
Corina, Glad you liked them. Your seasonings sound delicious!
Hi Corina,
I do not see much of a difference at all in convection times as opposed to the regular??? Am I missing something?
Thanks
Cesira