
How To Bake Chicken Wings That Are SOOO Crispy

For baked chicken wings that are perfectly crispy, you need our three-step method that’s loved by hundreds of thousands of cooks, cooks who come back here over and over again to make them. It’s the best chicken wing recipe ever!
Good news! You don’t have to deep fry wings in order to end up with deliciously crispy chicken. You can easily make trays of wings for game day in the oven with my crispy baked chicken wings recipe. A little bit of baking powder and a two-step baking method gives you delicious wings without a lot of effort.
Scroll down to read more about how it all comes together or click here to jump straight down to the recipe.
- Video: How To Make Crispy Oven Baked Wings
- Why Bake Chicken Wings?
- Why These Baked Wings Are SO Crispy
- Why Use Baking Powder?
- Can You Use Baking Soda Or Cornstarch?
- Time and Temperature for Baked Chicken Wings
- How To Bake Chicken Wings So They’re Extra Crispy
- Seasoning The Wings
- Sauce For Baked Wings
- Even Better Crispy Chicken Wings?
- More Chicken Wing Recipes
- Podcast Episode: Baking Chicken Wings
- Crispy Oven-Baked Chicken Wings Recipe

Video: How To Make Crispy Oven Baked Wings
Here’s a short video showing the three-step baking powder method for making crispy baked chicken wings. You’ll see the three steps in our process: (1) baking powder, (2) low temperature, (3) high temperature.
Why Bake Chicken Wings?
There are several factors that influence how you might choose to cook your wings. Here are the reasons that you might want to bake yours.
- You want a lot of wings. You can fit a lot more wings on a pan in the oven than you can in an air fryer or in a pot for deep frying. This means you can make a lot at once without working in batches!
- You want a hands-off process. Once they are in the oven, you don’t need to move them around or flip, making it super easy.
- You want crispy skin! With my baking method, you get wonderfully crispy chicken skin with very little fuss.
You can see in this How to Cook Chicken Wings post that we compared different ways of cooking chicken wings and baking is best for cooking for a crowd and the best option for crispy skin other than deep fried chicken wings.
Why These Baked Wings Are SO Crispy
These chicken wings are seriously so crispy, you’d think they were deep-fried. There are three reasons why they give you that crunch:
- They use a small amount of baking powder which helps crisp the skin, see more about why this happens below.
- They are baked at a low temperature first to really dry the skin out and to give the baking powder time to start working.
- High heat at the end to finish cooking the wings and to really brown and crisp the skin.
“My son says they’re as good as from his fave wing shop!”
Melody, TheCookful reader
Why Use Baking Powder?
Baking powder is a leavening agent usually used in baked goods such as cookies and cakes. It’s a mixture of sodium bicarbonate, cream of tartar, and cornstarch. But interestingly, when mixed with salt and dusted on chicken, after cooking, the chicken skin is extra crispy. Why does this happen?
It happens because baking powder is alkaline (the opposite of acidic). The addition of the baking powder therefore raises the pH level in the chicken, allowing the peptide bonds in the skin to break down, which in turn lets the skin get more crisp and brown.
You can also use this method with other cuts of chicken, like these amazingly crispy Baked Chicken Drumsticks. And, I’m going to tell you below how adding baking powder to a wet brine mixture can also get your crispy chicken skin.
Use Aluminum-Free Baking Powder
Note that while most of the comments below this post are very positive (people seriously love this method of baking crispy wings!) a couple of commenters noted a bitter taste on their wings. I at first thought that they were using baking soda instead of baking powder. Doing so would definitely lead to a terrible taste. However, they claimed that they were really using baking powder for sure. I was stymied until another helpful commenter posted this link showing that some people are sensitive to a flavor that is found in some brands of baking powder.
Baking powder that contains “sodium aluminum sulfate” has a bitter taste to some people. If you notice this flavor, you’ll want to try a different brand of baking powder. The Rumford Brand is aluminum-free, so that’s one to try. And note that Rumford is not a sponsor of this post or anything like that. We just know for sure that they are an aluminum-free brand.
Can You Use Baking Soda Or Cornstarch?
Baking soda is NOT a good substitute for baking powder. While baking powder does contain baking soda (sodium bicarbonate), baking soda alone is stronger and has a very metallic taste if used without being neutralized with an acid. The cream or tartar found in baking soda is acidic and neutralizes that taste.
In the comments below this recipe, several people have asked if they can use cornstarch instead of baking powder. While people do use cornstarch on their wings to make them crispy, it works in a different way. Baking powder changes the pH of the skin so that the skin itself gets crispier. On the other hand, when you put cornstarch on wings, it’s the cornstarch coating itself that is toasting and crisping.
Therefore, my answer is that you can use cornstarch on wings, but not as a substitute for the baking powder in this recipe – it won’t work the same way and the amounts would not be equivalent.
Time and Temperature for Baked Chicken Wings
We start at the low temperature of 250°F for 30 minutes to dry out the wings.
Then, without removing the wings from the oven, increase the temperature to 425°F and bake for 40-50 minutes more. This cooks the chicken through and browns the wings to crispy perfection. If your wings are smaller than average, you will likely only need to cook them for 30 minutes at this step.
How To Bake Chicken Wings So They’re Extra Crispy
Prep and Season
If you have whole wings, you can learn how to cut chicken wings here. (When you cut ten wings, you end up with 30 wing pieces. That’s 10 drumettes, 10 flaps and 10 wing tips. You’ll either discard the wing tips or save them for another use. That leaves 20 wing pieces that you’re using here.)
Note: You can leave the wings whole if you prefer and it won’t affect the cooking time. I think they area little more awkward to eat though. You also can leave the wing tips attached to the flap, but there’s so little meat on there that they aren’t the best to eat.
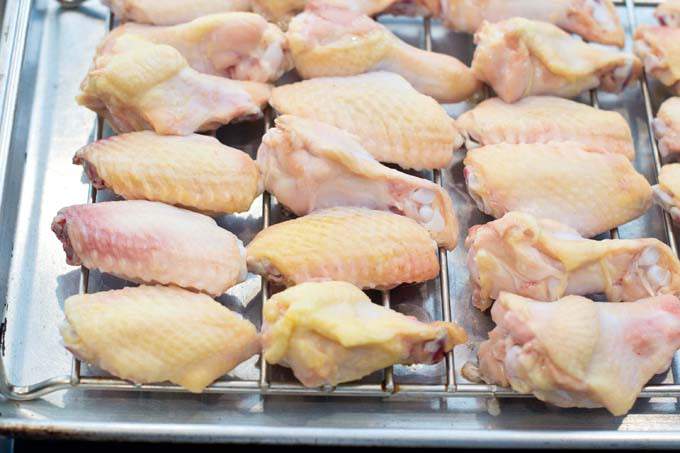
Once they’re all cut up, put them into a big bowl. Sprinkle with 1/2 teaspoon of salt and 1 tablespoon of aluminum-free baking powder (and NOT baking soda!). It doesn’t seem like much but you’re not trying to make a coating for the wings here. You’re trying to change their pH level so that they will crisp up better. Mix it up, I usually just toss it around or get in there with my hands.
I’ll also say that I am somewhat of a perfectionist and so to get a really even coatingthat is dispersed well on the wings, what I usually do is to put half of the wings into the bowl, sprinkle with half of the salt and baking powder, then add the other half of the wings and sprinkle with remaining salt and powder, and then I mix them with my hands. That just reduces the likelihood that the salt and baking powder will be overly concentrated on some wings.
Use A Wire Rack
Line a baking sheet with aluminum foil to make clean up easier. Then set an oven-safe metal rack onto the baking sheet. Spray the rack with cooking spray or lightly oil it to help prevent the chicken from sticking. Place the wings on the rack.
The rack is really helpful for crisping the wings because it allows air to circulate all around the chicken pieces so that they get evenly crisp. It also lets the fat drip away from the chicken so they’re not sitting in pools of fat, which will also reduce crispiness.

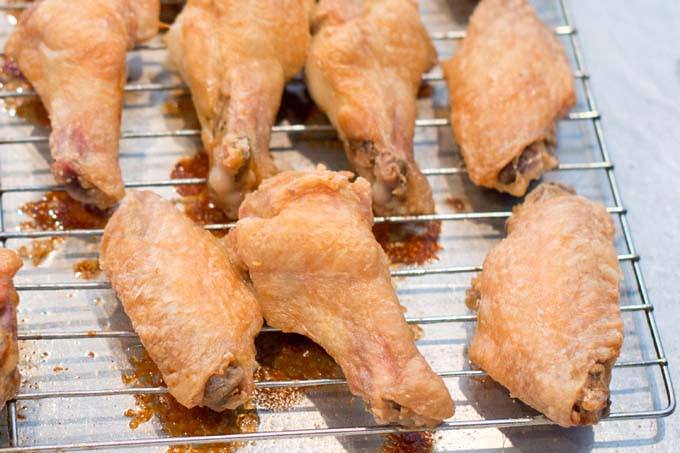
Start at a Low Temp
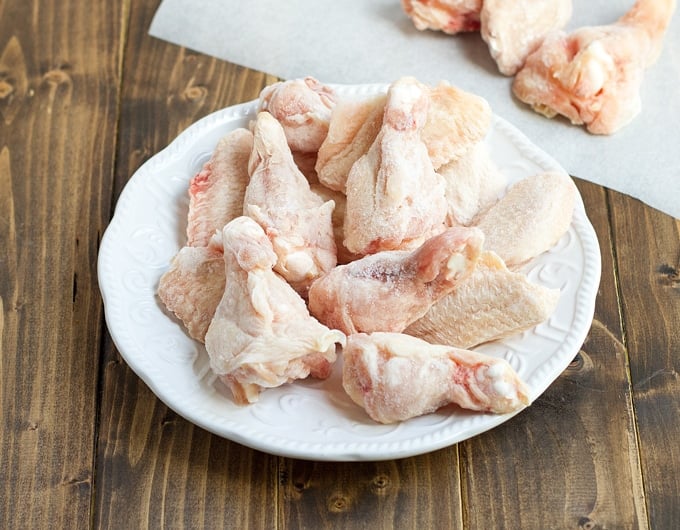
Place the chicken in a 250°F oven for 30 minutes. This gets some of the fat rendered from under the skin and starts that drying out process. Here’s how they look after 30 minutes. These are not cooked. Do not eat them yet.
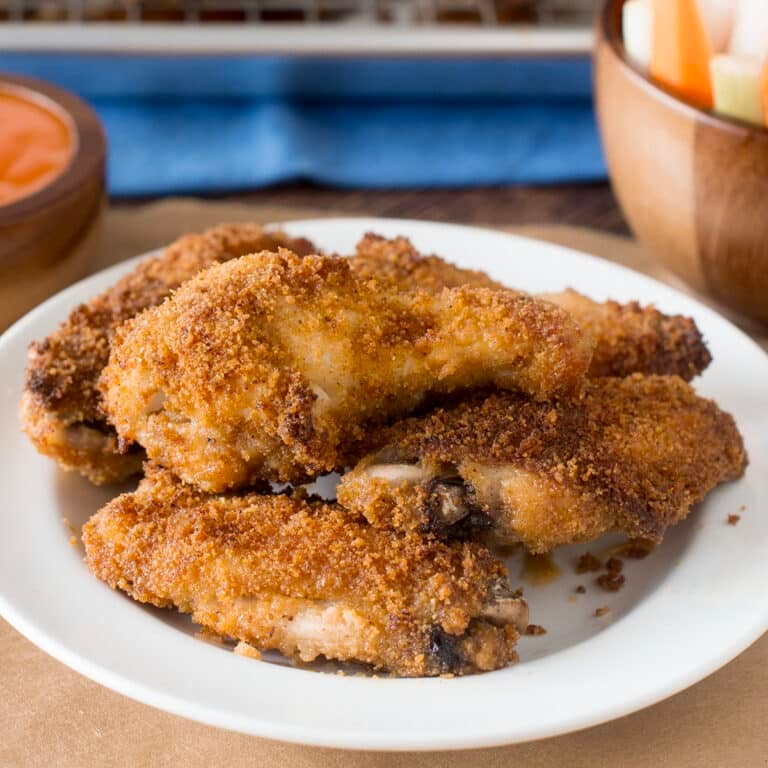
Finish with High Heat
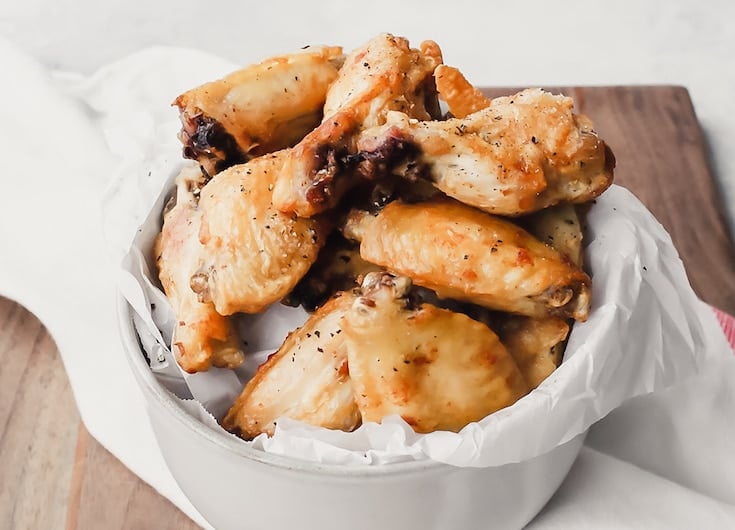
Leave them in the oven and crank the heat up to 425°F and cook 40-50 minutes more, until golden brown and so crispy. If your wings are smaller, skinnier ones, you will likely only need to cook them for 30 minutes at this step. If they’re crispy on the outside and their internal temperature on an instant read thermometer is 165°F, they’re done.
Note that a lot of people’s ovens aren’t calibrated well and usually run a bit lower than is displayed. If your wings are not browned well after 40 minutes, increase the heat to 450°F or even 475°F to get a final bit of browning on them.
In general, I highly recommend getting an oven thermometer that sits in your oven and tells you the actual internal temperature. They’re inexpensive and very useful if you’re trying to perfect your cooking. They sell them at a lot of grocery stores, and you can also get one on Amazon here.
Seasoning The Wings
You can season them before baking, but sometimes some spices burn from the high heat. I therefore prefer to toss them with just the salt and baking powder for baking and then add flavor with a spice blend and/or sauce after.
Having said that, this wing dry rub contains baking powder and great seasonings and works beautifully – these spices don’t burn.
After baking, my favorite is really just adding more salt, pepper, and garlic powder. Use regular fine salt, which is more likely to stick to the wings, not kosher or anything thick here. A bit of tajin seasoning thrown in is always good too! Or try these seasoning blends that are great on wings. And yes, pizza seasoning is one of them and is my kids’ favorite on crispy baked wings!
Sauce For Baked Wings
These wings are so crispy that I find it a shame to add moisture to them and lose any of the crispiness with a sauce, but if you must toss them with a sauce…
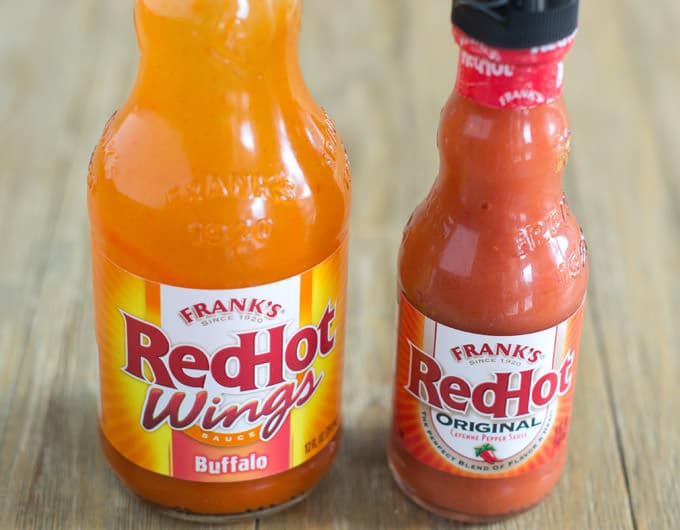
This easy decadent homemade Buffalo sauce will blow your mind or grab some BBQ sauce.
And then you’ll need a great dip, like ranch or blue cheese dressing. I prefer ranch dressing. You can grab a bottle at the store, make your own with fresh herbs like this, or make homemade ranch seasoning with ingredients from your pantry and stir together 1 cup of sour cream with 1 tablespoon of the seasoning. It’s so fresh-tasting and delicious!
Even Better Crispy Chicken Wings?
I have to tell you something. So it is absolutely true that the recipe below, the one I’ve been telling you about so far, is the one I’ve been using for over 15 years and is the one that everybody raves about it. I love it and my readers keep coming back and making it over and over. I still stand by it and it is still the same recipe down there that it has always been.
However, recently, I’ve started doing things a little differently at my house. I’ve started brining the wings in a mixture of water, salt, and you guessed it, baking powder. Why?
- The baking powder flavor is undetectable with the brine method.
- The chicken wing meat gets nicely seasoned right though from the salt brine, so much flavor.
- I swear, the skin is even crispier! It even kind of bubbles up in places as though it’s deep fried.
So, if you want to try something new, head over to my new crispy baked brined chicken wing recipe.
More Chicken Wing Recipes
If you haven’t guessed it already, I’m obsessed with chicken wings. Here are all of my chicken wing recipes for you to browse through. If you specifically want to bake wings but with a different flavor, try our Zesty Lemon Pepper Chicken Wings! They are baked with baking powder, salt, and lemon pepper seasoning, and then have fresh lemon zest and cracked pepper added at the end, which is so crazy-good! Or, if I haven’t convinced you that baking is the way to go, here are some other ways to cook your wings:
Podcast Episode: Baking Chicken Wings
Listen to me explain briefly about how to make this recipe, with some great tips along the way, by clicking the play button below:
Listen to more Recipe of the Day episodes here.
Print
Crispy Oven-Baked Chicken Wings Recipe
- Prep Time: 5 minutes
- Cook Time: 1 hour 20 minutes
- Total Time: 1 hour 25 minutes
- Yield: 20 wings 1x
- Category: Entrée
- Method: Baked
- Cuisine: American
DESCRIPTION
For perfectly crispy baked chicken wings, you need our trusted three-step baking powder method loved by hundreds of thousands of cooks.
Ingredients
- 10 whole chicken wings, cut into flats and drumettes (here’s how to do it). Discard tips or use for a stock. That leaves you with 20 wing pieces total
- 1 Tbsp. aluminum-free* baking powder (NOT baking soda)
- 1/2 tsp. salt
- Sauce or dry rub
Instructions
- Preheat oven to 250°F.
- Line a cookie sheet with aluminum foil. Place an oven-safe rack on top of cookie sheet. Spray rack with cooking spray or lightly oil it.
- In a large bowl, use your hands to toss the flats and drumettes with the baking powder and salt until chicken is evenly coated. But do not add extra baking powder, just mix them so they all have some.
- Place wings on the prepared rack in single layer. Transfer rack with the cookie sheet under it to oven and cook for 30 minutes. This baking at a low temperature dries the wings out and allows the baking powder to penetrate.
- After 30 minutes, leave the wings in the oven but raise the heat to 425°F. Continue to cook until brown and crispy, 40-50 minutes.**
- Take wings out and let rest 5 minutes. Toss in a delicious sauce like this one and serve.
Love this recipe? I’d appreciate it if you could scroll down and add a *5 star rating* to help others know they’ll love it as well!
Notes
This post originally appeared in January 2016 and was revised and republished in December 2024.


Have used this recipe three times, and all three times the wings were amazing. Not dried out even after what seems like a LONG time in the oven for small pieces, and no taste of powder. 1 T was plenty on 18 very dry wing pieces (paper towel, and then sometimes on a rack overnight in the fridge), and I probably could have chucked another pouch of party wings (wings with tips removed and broken at joint into two pieces) in there with no additional baking powder. VERY interesting updates re using non-aluminum powder, and I do wonder if that taste detection is like the cilantro conundrum. Some folks LOVE cilantro, and to others it smells like vomit. :O Thanks for posting, and for all the good updates/ideas from everyone. A wonderful use of the internet! 🙂
I just came here to say that I made these (for the second time b/c they were phenomenal the first time!) tonight with baking SODA… Ugh, fail.
Krisin, Oh no! I’m so sorry that happened! They’re dreadful with baking soda, I know.
Some of the driest tasting chicken Ive ever had in my life.
Wow, this has to be the worst meal I have ever cooked! The taste of baking powder and the way it dries out your mouth is awful. I don’t necessarily find baking powder bitter, but definitely not something I want as a principal ingredient. I was hoping that a sauce might have disguised the taste and mouth feel, but hours later it still hasn’t gone away. My husband who will eat pretty much any experiment I put in front of him couldn’t even eat these wings and I followed the recipe down to the letter. We spent the evening apologizing to each other, me for presenting him with such an inedible meal and him for not being able to eat it. At least we had lots of veggies to fill up on. So much for the science!
I’m not sure what to say. Lots and lots of people have tried this recipe and loved it, as you can see in the comments. When I make it, and I make it often, I can’t taste the baking powder at all. There’s only 1 tablespoon of it for 20 wing pieces. I have no idea what went wrong for you but you shouldn’t have been able to taste it. 1 tablespoon (15 milliliters) of baking powder (not baking soda), and ideally an aluminum-free baking powder, for 10 wings, each cut into two pieces yielding 20 pieces.
These wings are the best!
Thanks Saige! I love them too!!!
Is it ok to add baking powder to chicken? I mean is it healthy or are there things we should know about ingesting baking powder?
Hey all! I did a batch of wings tonight and have to say, they came out pretty good. I only say pretty good because I amk and have eternally been, a diehard deep fryer guy when it comes to wings registering 20 years plus with using peanut or veggie oil. Because it was a rainy Sunday here in PA, I opted to try the oven.
So hear is the real deal folks. Using this recipe is a winner. BUT, YOU MUST FLIP THESE WINGS halfway through the baking process in order to get a full crisp all around when using a baking rack over a cookie sheet pan layered with aluminum foil (and a layer of salt if you wish to absorb moisture). This comment was brought out earlier by another person so I am here to reinforce the point.
I did my wings as directed at 250 for 30 minutes followed by 50 minutes at 425 and actually thought they could go 60 minutes; however, I am the kind of guy that likes my wings very/very crispy. With that, my wife loved these wings because they were not like the deep fried version I usually do. In a way, they had the shake and bake version but MUCH better since they were smaller. Please know, I hate shake and bake chicken because chicken legs and thighs just do not get as crispy as this recipe.
So, what does this mean? Flip’em folks! I will be sure to give this recipe another try next time when it is raining and give it a B+ but only because I am a deep fryer guy. The A+ though comes in with the hot wing sauce. I gotta tell you, I like this recipe as it has a very nice flavor and does not have an overwhelming heat to it allowing you to eat with ease.
Hey John, Thanks for the comments and feedback. Glad you loved the sauce too!
These come out so crispy! Have only made wings a few times but these by far are the best. Got some in the oven now. I was really impressed!
Thanks Misty!
My husband and I moved from N.Y. state and missed the chicken wings. The best chicken wings I’ve never had were at Marcos in Arcade, Ny. Anyways, i tried your recipe and woah, these wings it so close to home. My husband was impressed and said these were the best he had since moving. I tossed them in melted butter, garlic, and wing sauce. Sooooo good. This recipe is a winner! Thank you! -Buffy
Buffy, That’s such a fantastic compliment. Thank you so much for trying them and for letting us know how much you liked them!
OH. MY. GOSH. These are unbelievably delicious, and you have to try them! I made these today, exactly as directed in the recipe, and they are so, so good! Even without any type of sauce or doctoring up, they are fantastic. They don’t need salt or pepper, even! I planned on a sauce, bu I ate mine plain and only stopped eating them because I’m watching my weight. They are so tempting to keep eating, though! Thanks for such a great recipe!
Ha! Marcella! Thank you so much for your comment. That is exactly how I feel about these wings too!
Note re: ALUMINUM-FREE BAKING POWDER. Be sure to check your can of baking powder to make sure it does not have aluminum in it. While prepping for this recipe, I found The Clabber Girl does have it, even though I found an article online that stated they removed it. They did, but it is not marketed as Clabber Girl, but Rumford; I found Rumford that is by the same manufacturer of CG online, but it is not available in stores near me. But here is the GOOD NEWS: You can make your own baking powder with no aluminum in it by combining 1 teaspoon baking soda and 2 teaspoons cream of tartar. Of course, you would have to figure how to make the amount needed for this recipe. I honestly just found this recipe today and have not made it, but I do have the wings and I am eager to make it this week. I just wanted to share what I learned about the baking powder. Can’t wait to try this recipe.
Thanks for the tips, Marcella!
Sorry for my typos. Phones!! *sigh*
So this worked out well. I am currently making it for the second time today… right now.
I rinse my wings first. Then i lime the up for more rinse (since i don’t have lemon juice; and to ensure to get the chicken smell out).
I probably use more salt than in the recipe. Do the baking powder thing. THANK YOU FOR THE HEADS UP ON THE RUMFORD. I put my bigger baking rack (technically a cooling rack) on my flat pan (not a cookie sheet). The rack is slight bigger so ot sits on the lips on the ends of the pan. I put half the chicken on as is. And the other half get some dessert heat seasoning mix on it (I bought it from Buffalo Wild Wings). Then stuck them in oven 250 degrees for 30 min per the recipe. Then I reduce temp to 400 degrees (I don’t do 425 degrees) for 40 min only. When i take them out, I add more Desser Heat to that half of the wings and shake ’em up. Then, the other half of the wings get Thai Chili Sauce poured on them (bought from Costco). And then I gets busy! They are great. Thanks for the great recipe.
I should add, the best thing about this is it is SUPER EASY!
Peace.
Faye, Thanks so much for your feedback and for sharing how you make them. That Thai sauce sounds amazing!
Does the baking powder & salt need to be applied relatively close to the start of cooking time? I typically season up my wings and let them sit or marinate overnight in the fridge. Would adding the baking powder & salt the night before result in wings that were dried out to a crisp prior to even starting cooking?
Reggie, I’ve never tried it but I believe you can toss them and then put them on the tray in the fridge uncovered and that will make them even drier and even crispier. I’m not positive but you might even be able to skip the first cooking step at the low temperature if you do that.
I’ve used this recipe several times. I am really surprised at how crispy they get. I’m glad I no longer have to fry them. My tiny fryer can only do about 4-5 wings at a time, and I don’t really fry much else, so I usually have no idea what to do with the oil. It just seems like such a waste to use so much oil for just one meal.
Angel, One of my favorite things about this recipe is how many wings you can do at a time. It is so much more convenient than frying, I agree. Thanks for your feedback!
So what I have found this becomes way to Smokey in the house! My trick is when you cook them you elevate them using a cookie cooling rack or my smoker racks are small engough for my pan, add water to the pan below it so when it drips it goes into water and not the pan. This allows it to not burn grease and keeps your house free from the burning chicken smell. Hope this works for you. Great recipe!
Chris, Great tip! I know that when I make these I don’t have any issues with smoking but I have read about the problem a few times in the comments here. I hope this helps anyone having that issue. Thank you!!!